
I’m Sweet For Concrete… Planters
Psssst… this post *might* contain affiliate links: see my disclosure here.
Easy DIY Concrete Planters
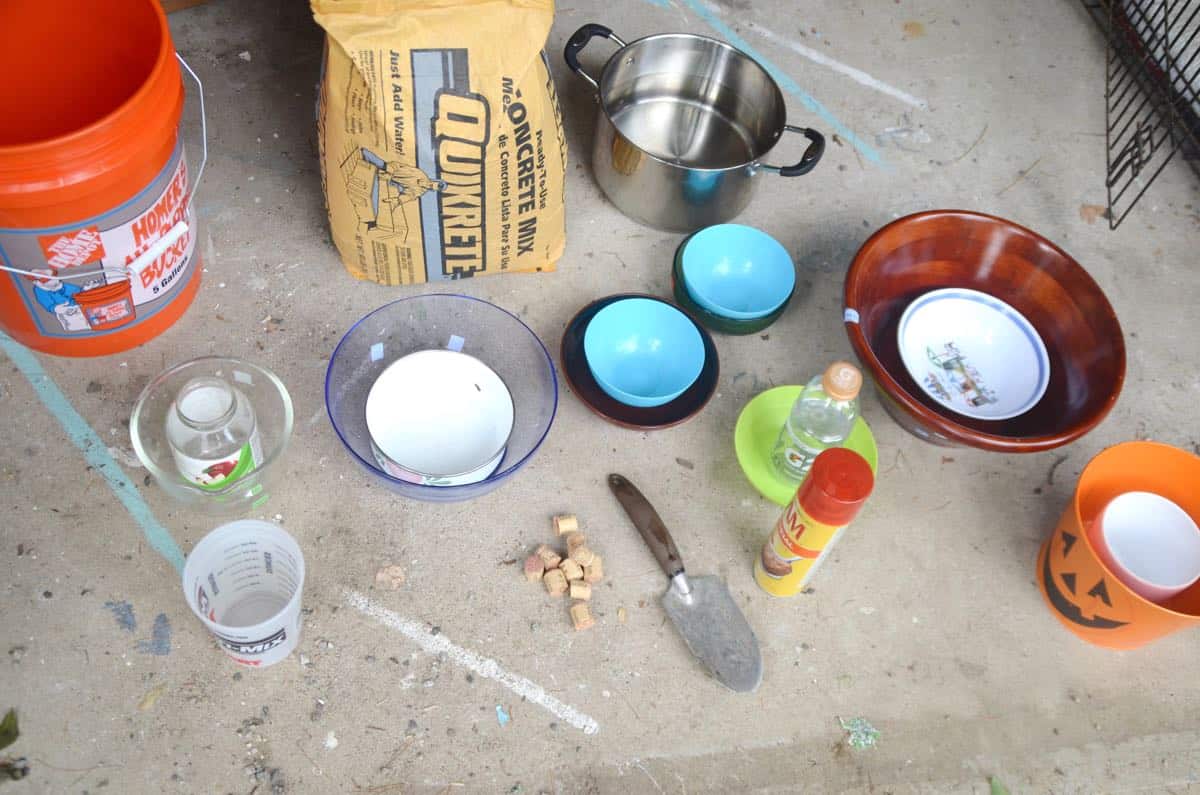
I love a chic and rustic planter, but they can be a budget breaker. Thankfully, they’re easy to DIY, don’t require any fancy tools or supplies and will cost you under $20! Full material list at the end of the post, but you’re going to need some concrete, and a bunch of thrifted containers.
How to Make Concrete Garden Planters
Step 1: Mix the Concrete
I used Quikrete concrete powder from Home Depot. It comes in an 80 lb bag that is like lead; this tiny little bag is immovable without grunting and straining and generally looking awful. The instructions say to mix the entire 80 lb bag with water, but that was obviously too much for my handful of garden containers so I mixed smaller batches at a time. Getting the ratio was a little tricky: I found one website that said 54 ounces of Quikrete to 4 ounces of water would work so I started with that. The concrete seemed a little gritty and dry so I added more water until it was the consistency of peanut butter (maybe 8-10 ounces water total); I’ve seen some folks mention a 1:4 ratio which is actually pretty close to what I did. (Affiliate links included in this post.)
Shop my favorites!
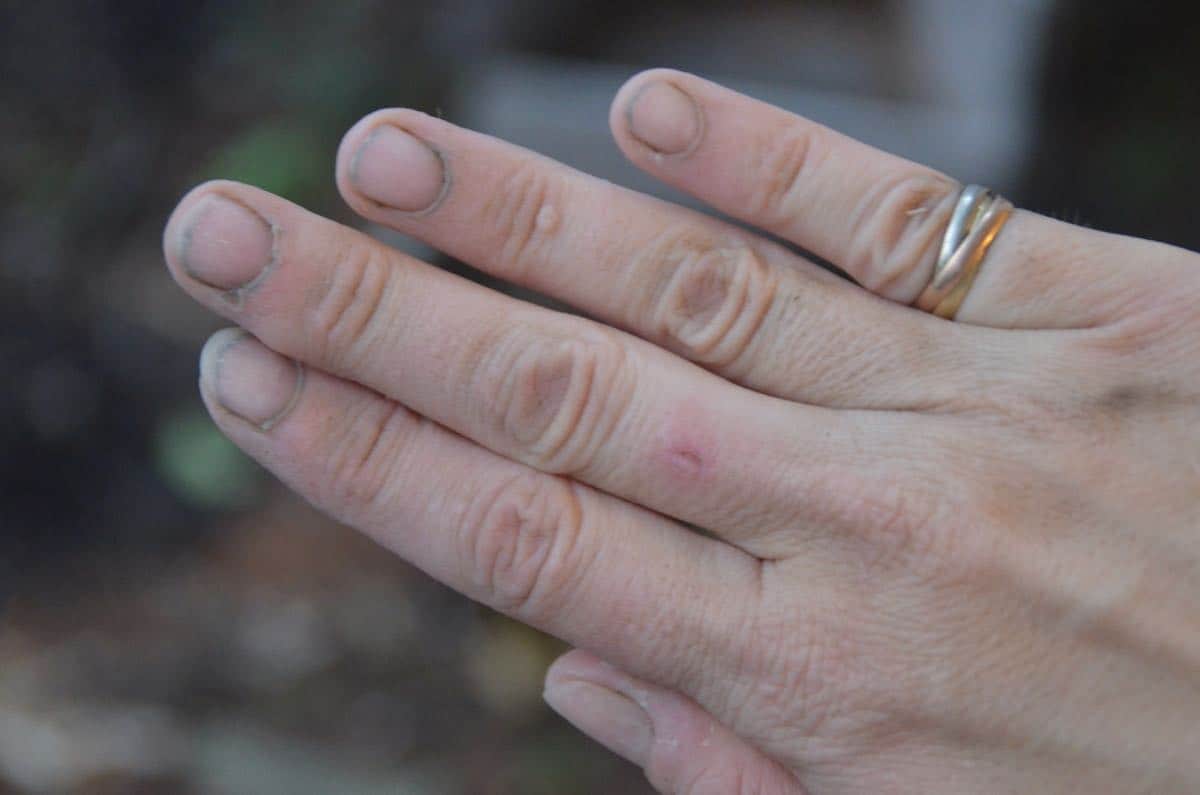
Following the tips online, I donned my gloves and mixed the concrete by hand. FYI, latex gloves don’t stand a chance against the grit and rocks of concrete… the finger tips tore immediately so I might as well have been using my bare hands. Rubber gloves would have been a better idea.
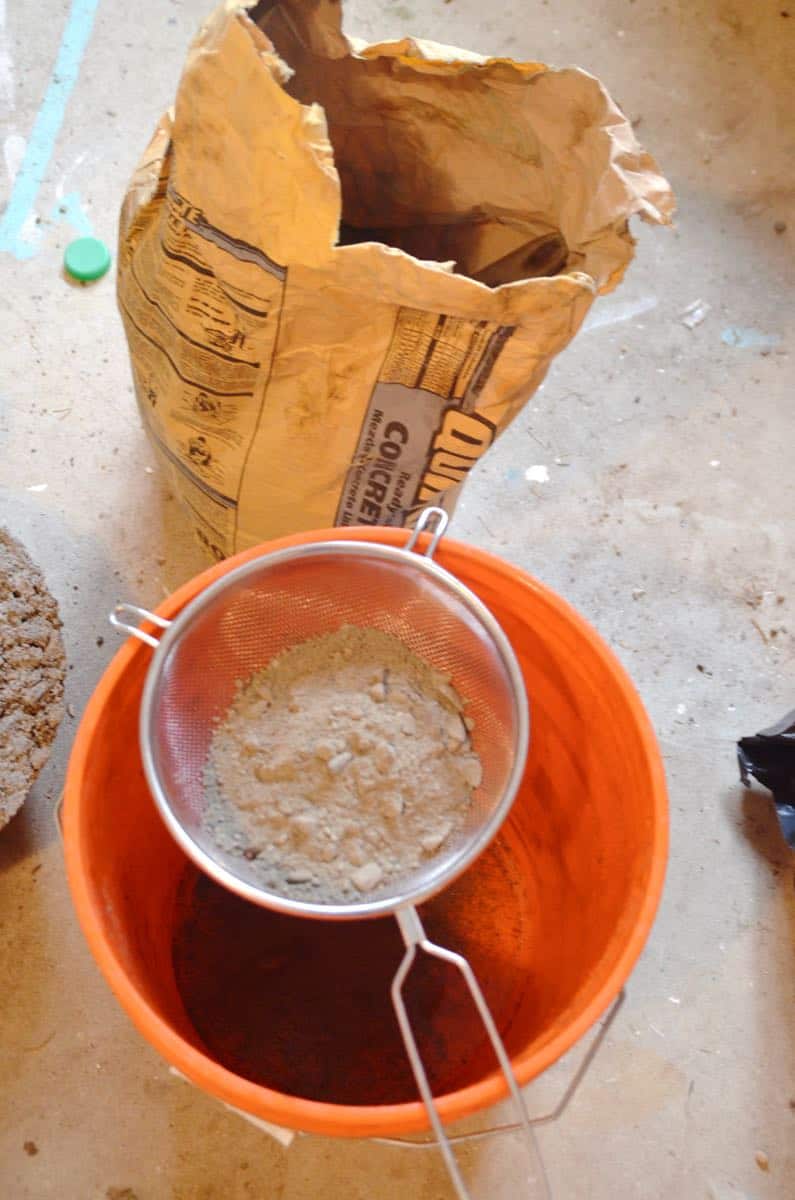
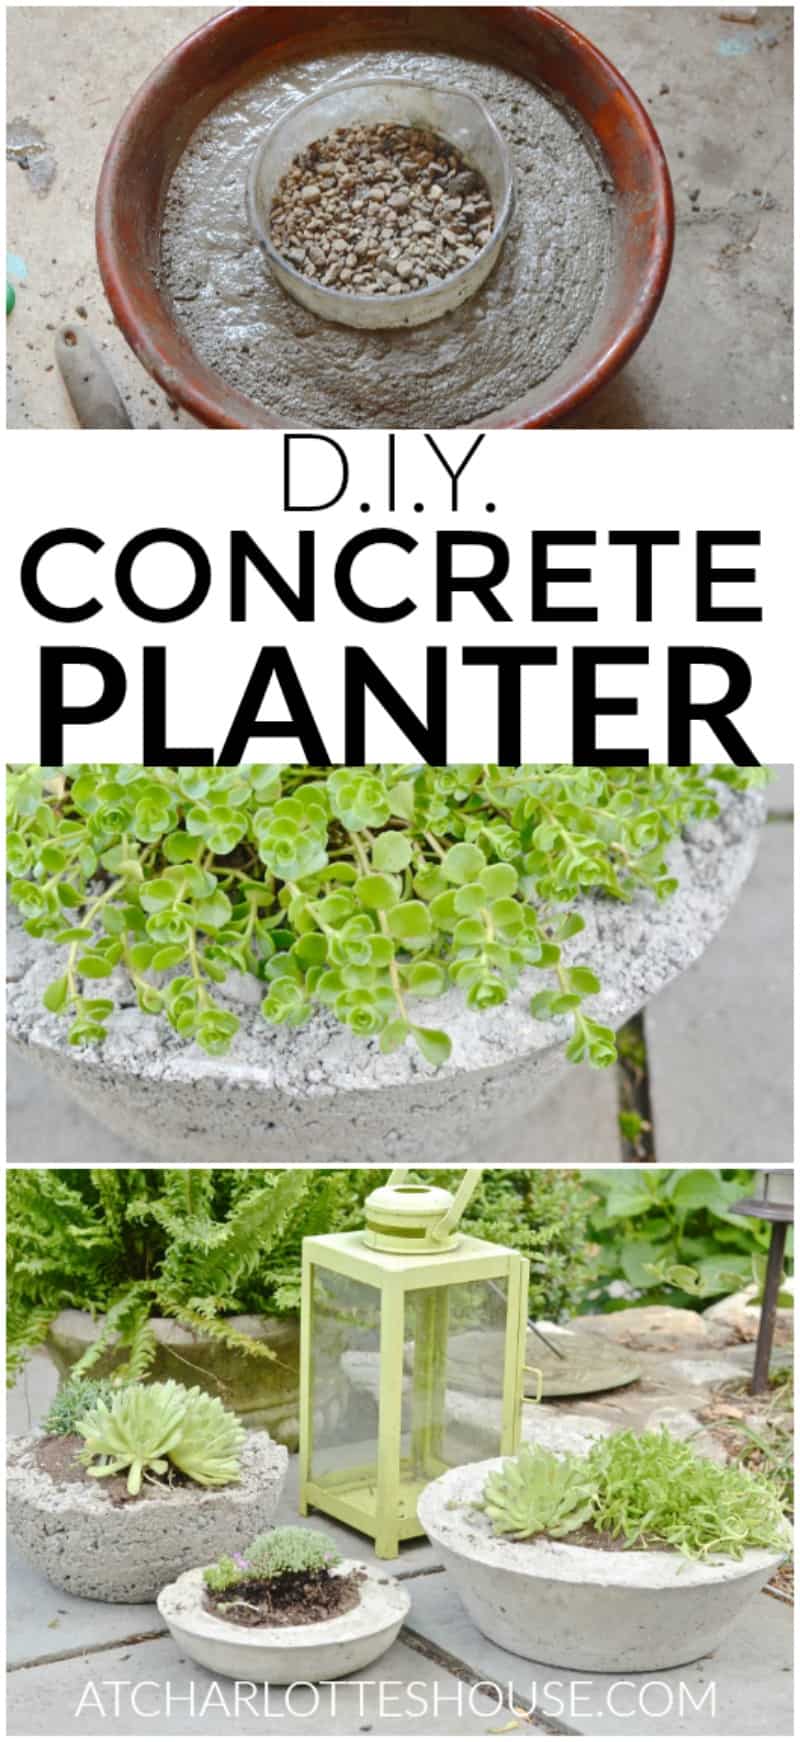
Step 2. Fill the molds
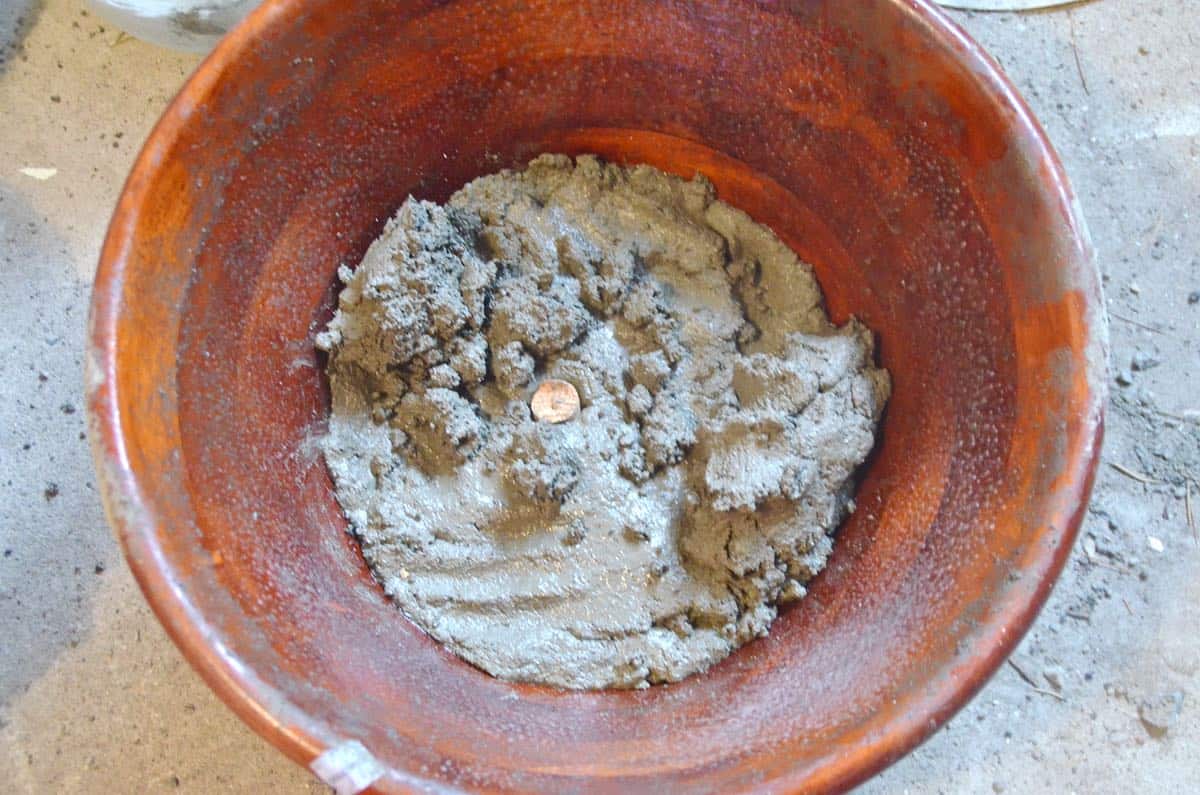
For the first mold, I filled up the bowl and tried to press the center container into the concrete. The concrete was way too thick and dense so I ended up filling the bottom an inch, placing the center container, then filling in the concrete around it. Because these are going to be planters, I wanted a drainage hole. Many of the online tutorials I saw mentioned that drilling this drainage hole was difficult so I used a cork (cut in half) to create the hole in the mold. I poured the first inch of concrete, pressed the cork into the bottom, then set the center container on top of the cork before filling all around.
Step 3. Release the molds
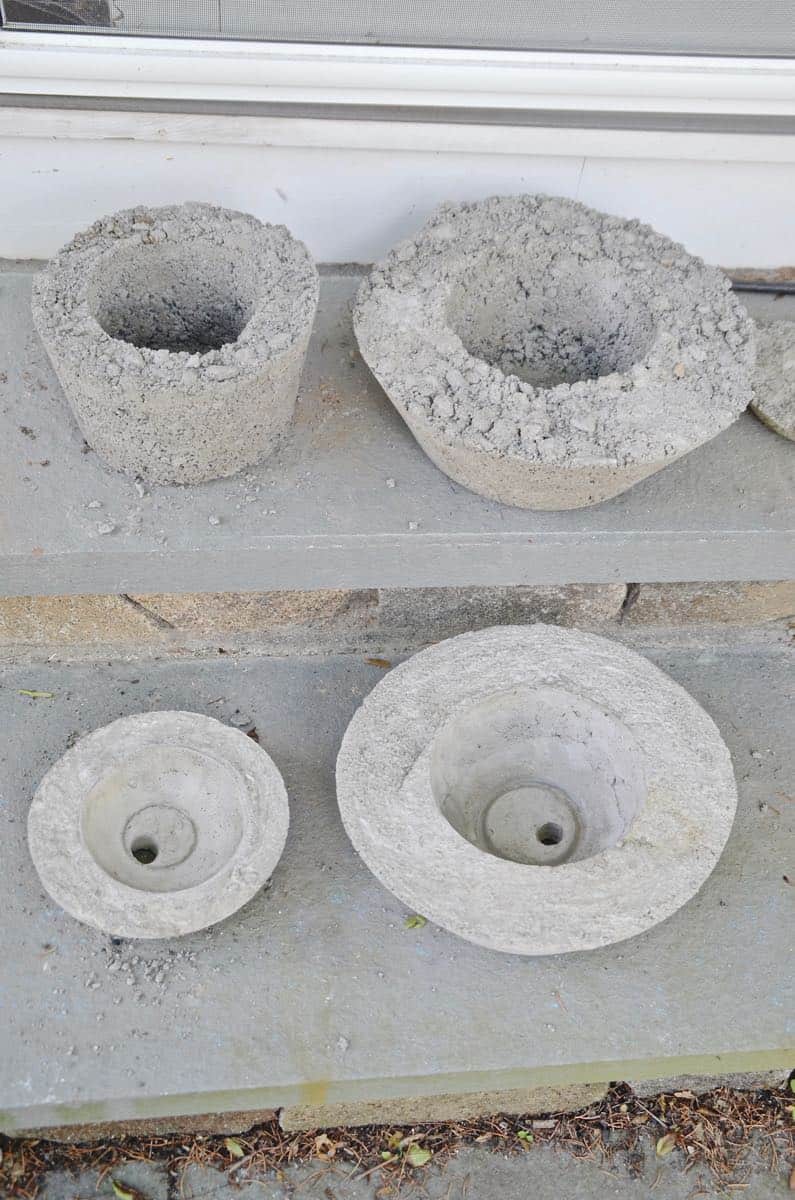
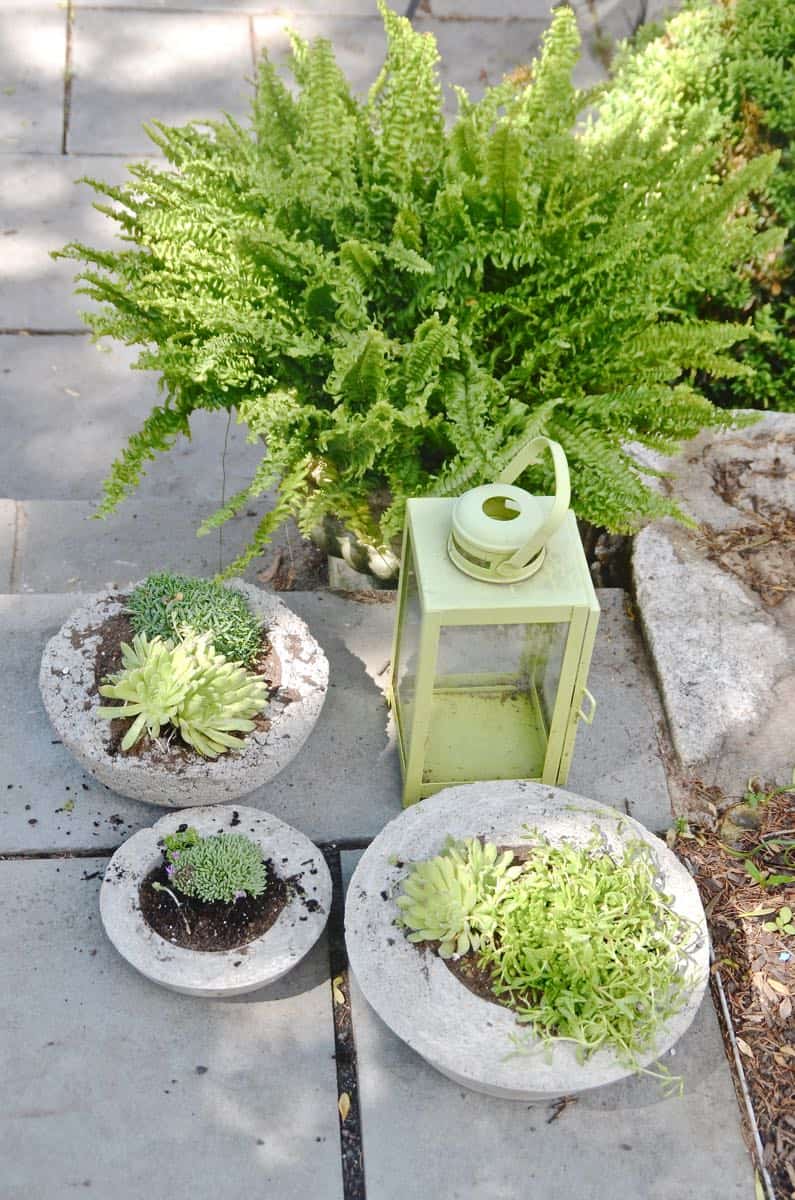
The concrete I was using takes 4 days to set (there are other quick set options but they were sold out at our store when I went shopping). Most of my containers came out pretty easily, but I had to manhandle and tap some of them with a rubber mallet. This first batch was perhaps a little TOO rustic…
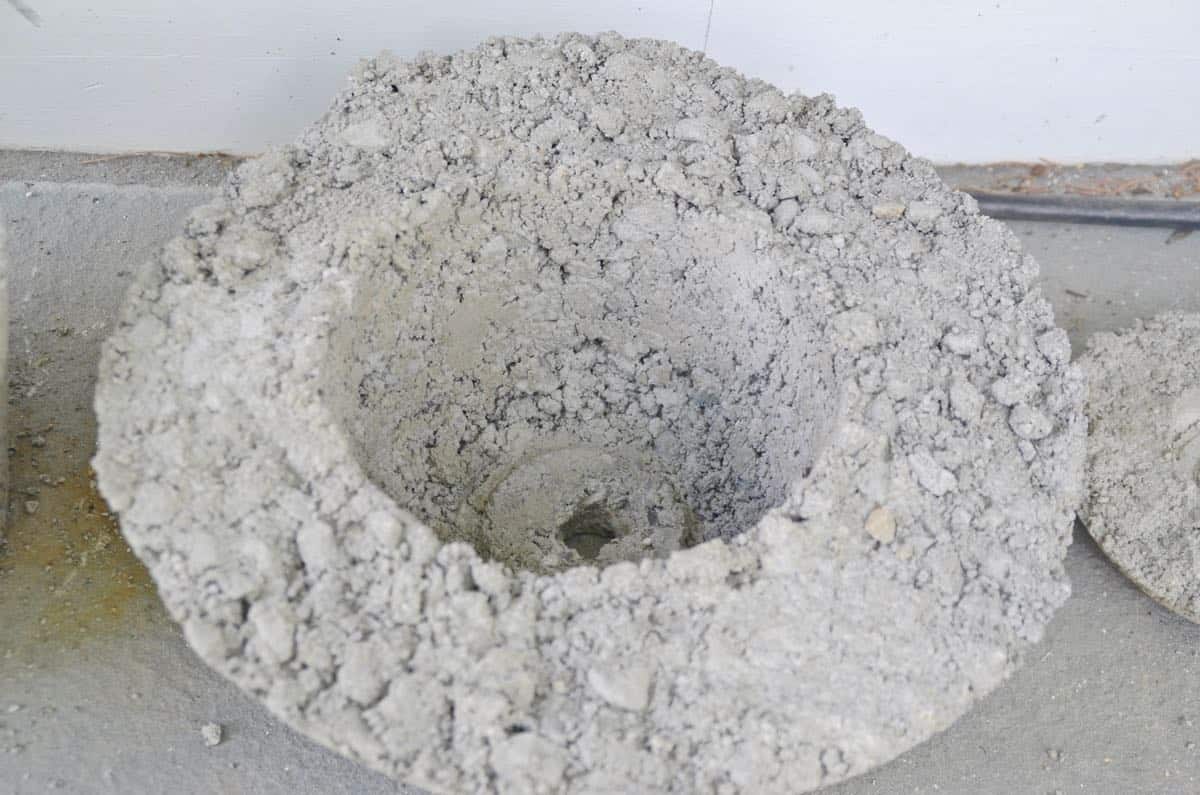
Optional: Sift out Pebbles in Concrete Mix
The concrete mix had lots of pebbles and grit and it just didn’t look as smooth as I would have liked… perhaps I could have mixed it better, but I still had half a bag left, so back to the workroom (empty pre-demo garage). This time I used a sieve to remove all the pebbles and had a smooth powder remaining. Note: There are LOTS of different varieties of concrete mix… our store was limited, but some won’t have pebbles.
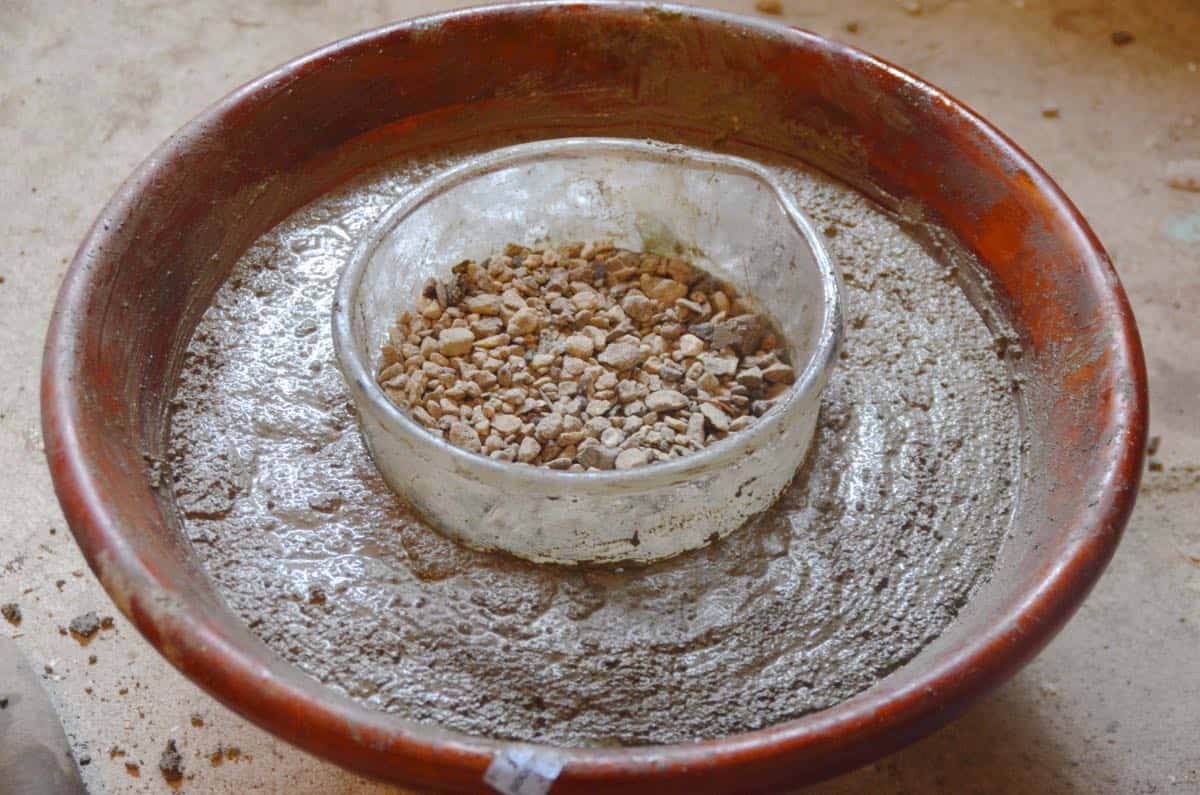
This mixed up MUCH easier. I didn’t measure this go round and just added water until the consistency was a little runnier than peanut butter… maybe cream of wheat or grits. Because the concrete no longer had the cumbersome pebbles, I was able to press the inner mold into the concrete much easier like the tutorials online had mentioned. Notice that I used gravel to weigh down my inner mold so it wouldn’t float up! I tapped the containers against the ground to remove air bubbles and smooth out the surface (you can also tap the side of the mold gently with a rubber mallet to remove air bubbles)… feeling MUCH more encouraged, the waiting game started again.
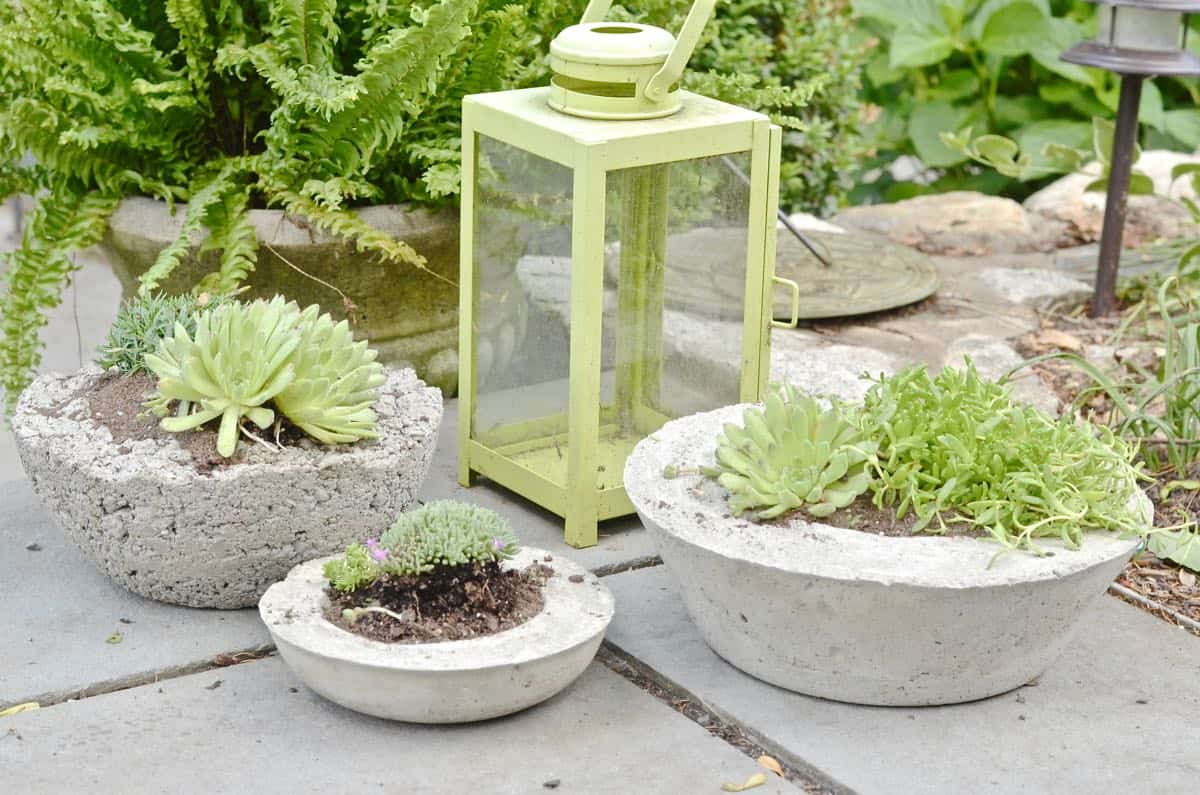
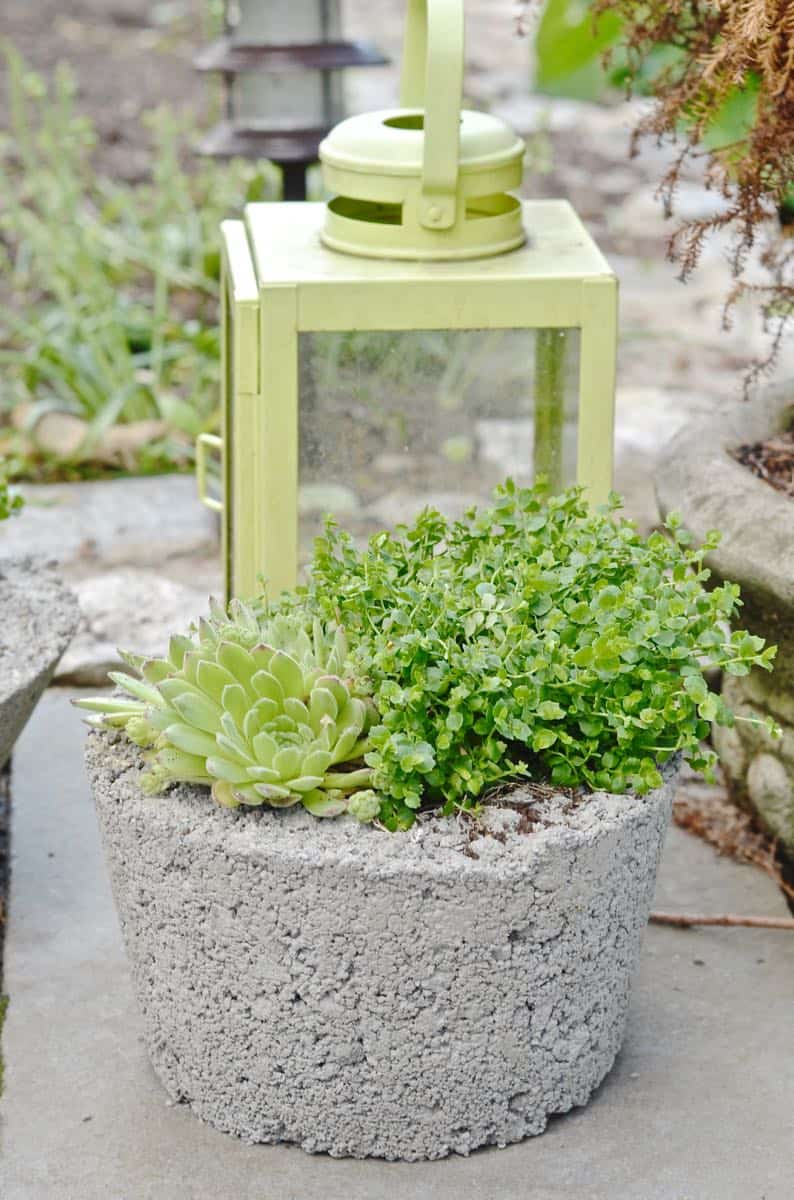
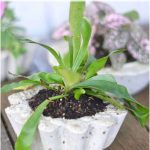
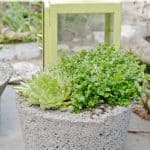
Sure enough, batch #2 without the pebbles was a winner. Here’s the comparison of rough vs. smooth. Turns out the rough concrete doesn’t look so bad once planted, but I still prefer the smooth finish. For an additional $3.75, I might just splurge on another bag of concrete and play around some more. Did I mention, I’m obsessed?!
What a difference a few days and a bag of concrete can make!

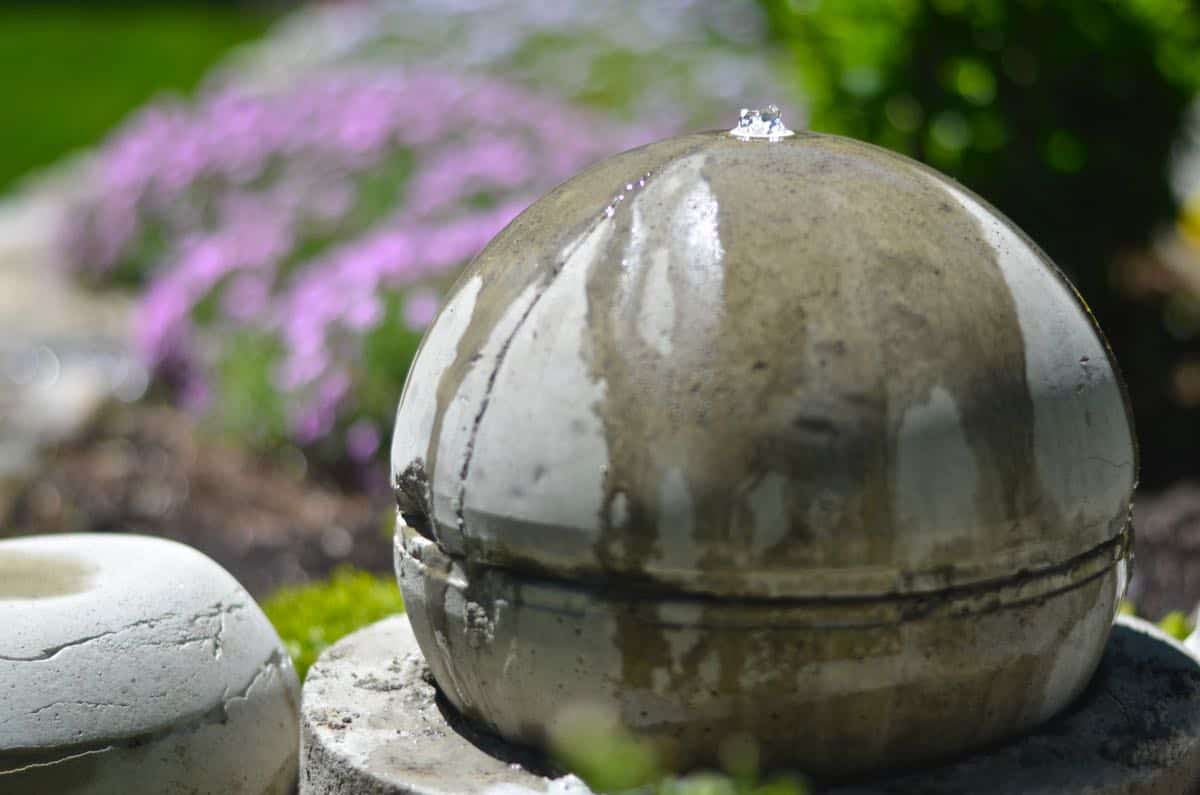
Like concrete? I also made this fun fountain!
I used concrete to refinish an ugly and dated countertop!

And… so that I could film the process for my YouTube channel, I made another batch of concrete planters using slightly different molds here.


i love the roundy shapes. thanks for doing all the hard work. gonna give a try
Me too! I really could make a dozen more… for 3.75, hard not to justify it! 🙂
Ooooh, I have always wanted to try this.
I like how you tried it with both large and small aggregate.
“Aggregate” makes it sound MUCH smarter… should have used that in the post. 😉 Now for bigger molds!!
Great job! I love the two different looks by using different types!
Thanks for sharing at the Remodelaholic weekend party!
Lorene and Cassity from Remodelaholic
Thanks, Lorene! THe chunkier one definitely looks better with plants… but I would still vote for the sifted version! 🙂
Nice job on the planters. I like both textures, gives a little different look but they coordinate nicely. Love the succulents in especially. If you want to save yourself some work next time, can purchase Portland Cement (located right next to bags of the aggregate type) Portland is smooth with no stones in the mix.
GREAT tip…. needed you a month ago. 🙂 Thanks!!
Char,
ooooo very nice. like it!!! thanks for the pics and instructions. you’re doll and garden elf.
T
Hi there! Love this idea, tried it but there’s a lot of concrete dust coming off it. Did this happen with yours? It creates a big mess of it whenever I move it anywhere in the house. I wonder if there’s anything I can do in the mixing/curing that would stop this?
Hi Jenn,
There’s DEFInitely a lot of dust when I’m mixing it… but I don’t notice it so much once the whole thing has cured. That said, these are outside and don’t get moved around too much. I used a pretty sandy mix for these, so I wonder if a different (finer grain) concrete would be dustier? Can you paint a thin layer of clear polycrylic on top maybe?
Do they come out of the mold easy or need to spray the mold with something
Hi Ann! For the most part, yes! I sprayed the molds with Pam cooking spray, but the plastic bowls were piece of cake. I had one metal one that was tricker, and took some banging and prodding.
I built a new patio area in my back yard last year. I couldnt decide what material to use though, I did all my research and I ended up going with a resin base. I do really like conrete like yourself though and I though it would be a shame not to incude any conrete, so I think I may add a few planters like these ones. Thanks for sharing guys.
Sounds lovely! I’m impressed!
what a good idea. we install a lot of resin bound paving and resin driveways too. we have to lay the resin bound aggregates on top of concrete. i think the planters are a great idea for making sure any excess concrete is used and not wasted. thanks charlotte.
Yep. Nothing worse than disposing of old concrete! Good idea!