
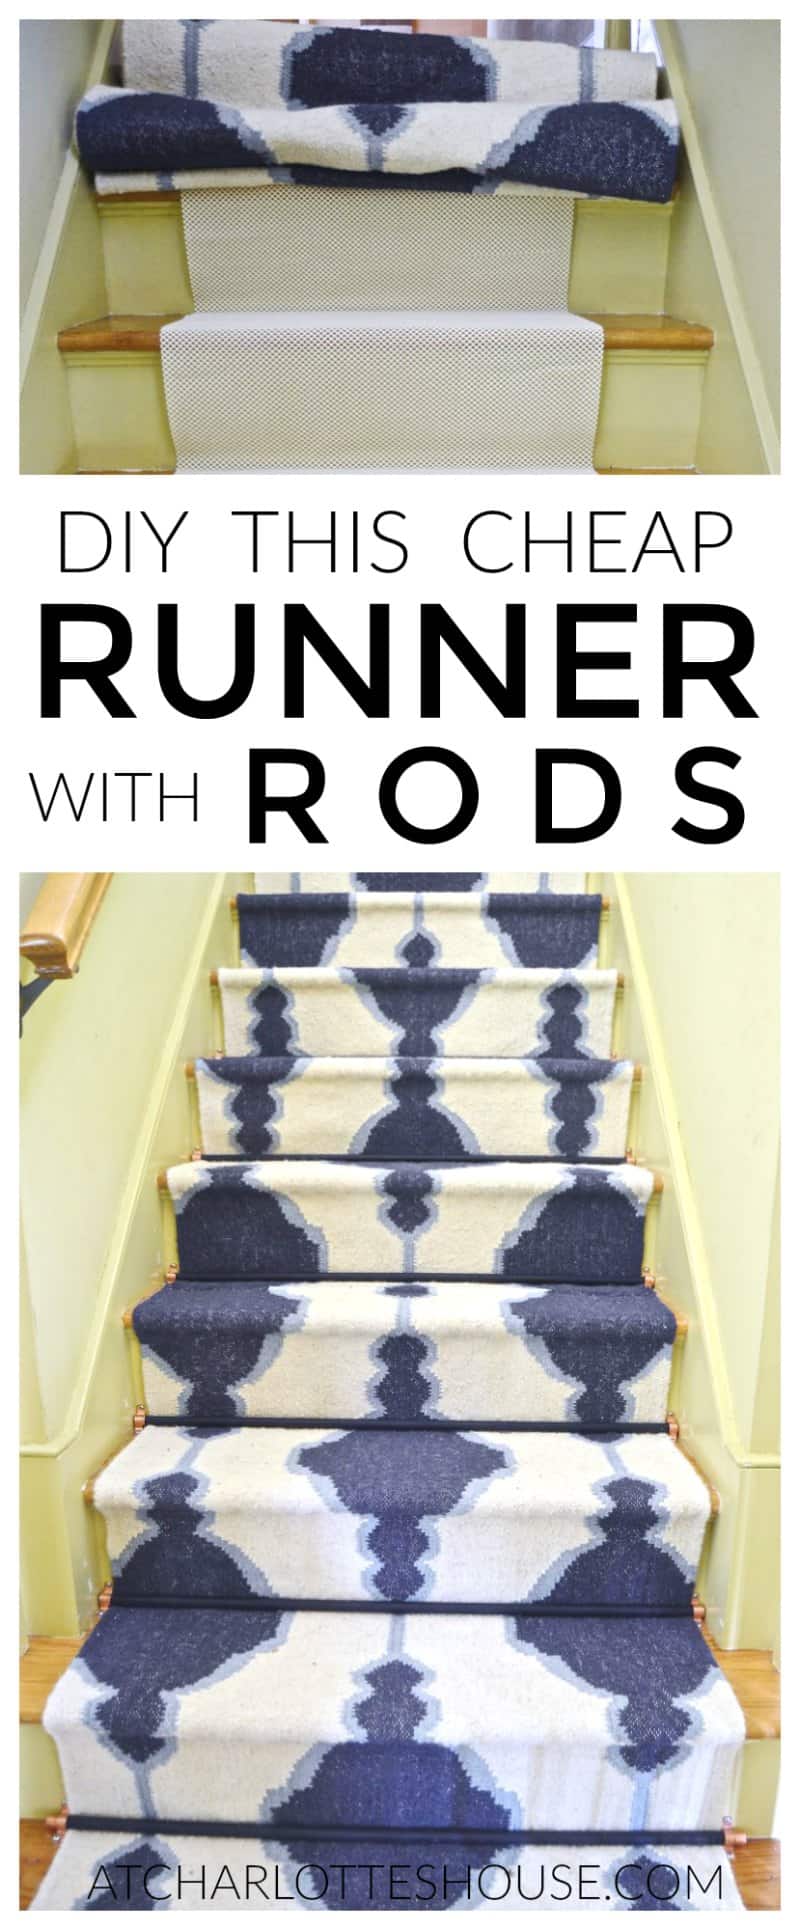
DIY Staircase Runner with Stair Rods… For Cheap
Psssst… this post *might* contain affiliate links: see my disclosure here.
Disclosure: I was planning this project long before I stumbled across these beautiful runners from RugsUSA… I am fortunate enough that they sent these to me for free, but obviously all opinions and carpeting hacks are all my own.
I’m SO excited to share this project with you… this is one of those rare DIY moments when a little nugget of an idea percolates… and it TOTALLY comes out better then you expect! Keep reading to see how I made a staircase runner WITH stair rods for… well, a lot less than the alternative.
Shop my favorites!
A little back story… at our old house, I made a staircase runner for under $50 and it was awesome. It involved a series of Ikea throw rugs and my staple gun. It held up until we moved and I might replicate it on the stairs going up to our third floor in this new house. But we have a set of back stairs that get the most traffic and I wanted to try something new. I reached out to RugsUSA and they sent my eager mitts a few of these beautiful runners. These are legit flat-weave rugs. They’re heavy and durable and so pretty. Although, unlike the cotton Ikea ones, I don’t have the luxury of layering or cutting or sewing to make these fit the space.
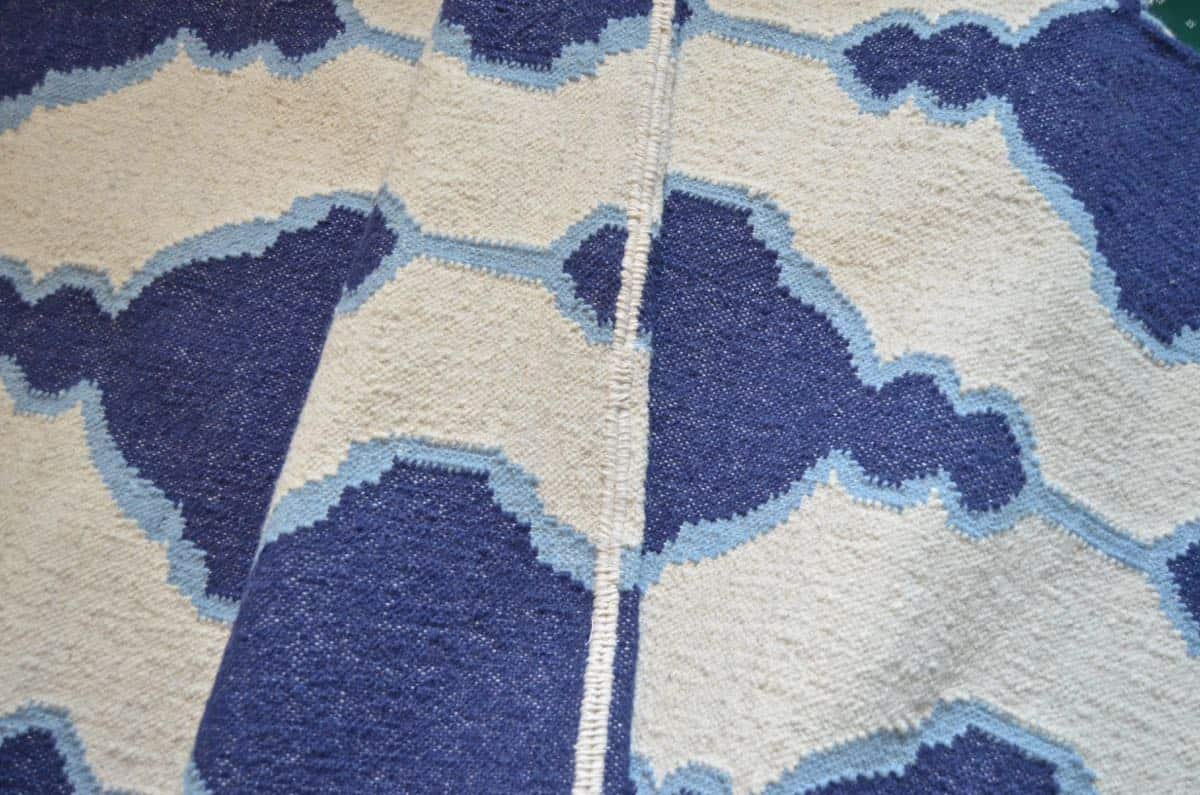
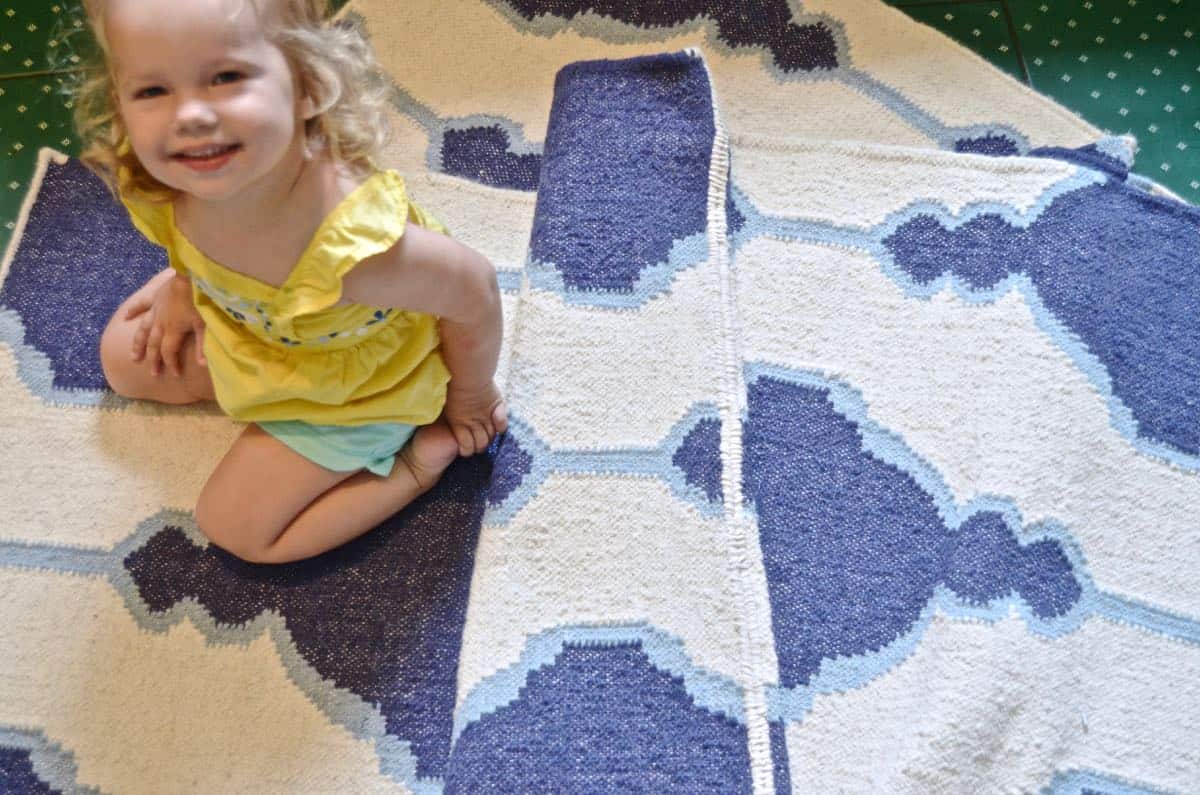
So… I had to sew the two runners end to end. This is the most tedious part of the project so hang in there. I had some heavy cotton twine and an upholstery needle… these were a big help. The twine matched the color of the existing edging perfectly, and the heavy-duty needle was so helpful when hand sewing big heavy wool rugs. I did a figure-8 pattern so the rug edges would stay flat… basically, up through one side of the 1st rug, down through the middle where the rugs meet, and then up through the other side of the 2nd rug.
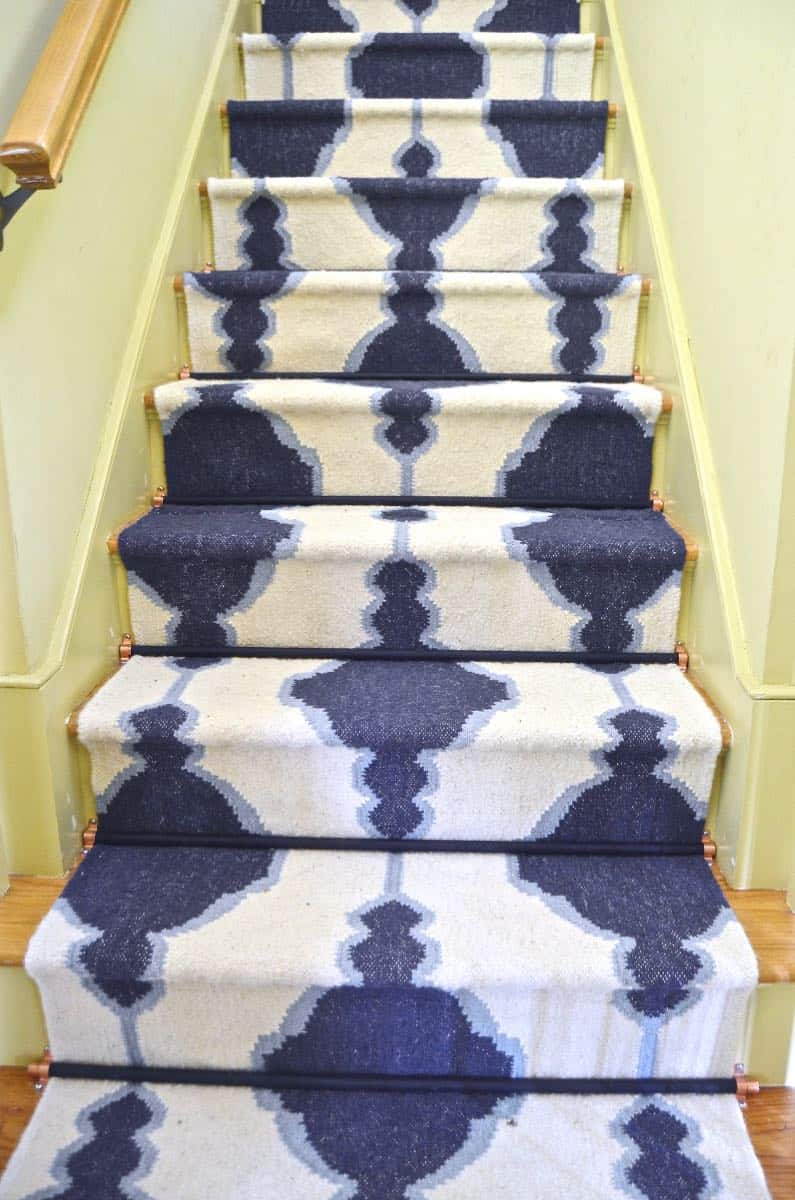
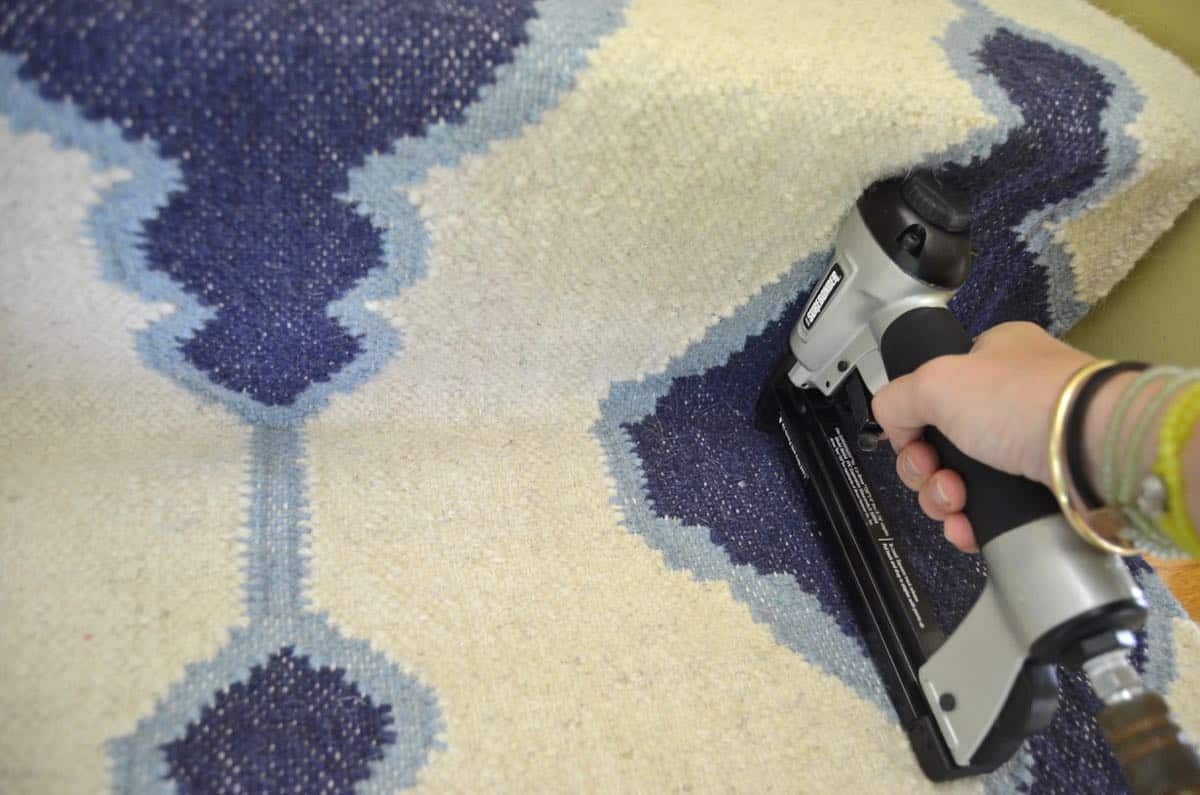
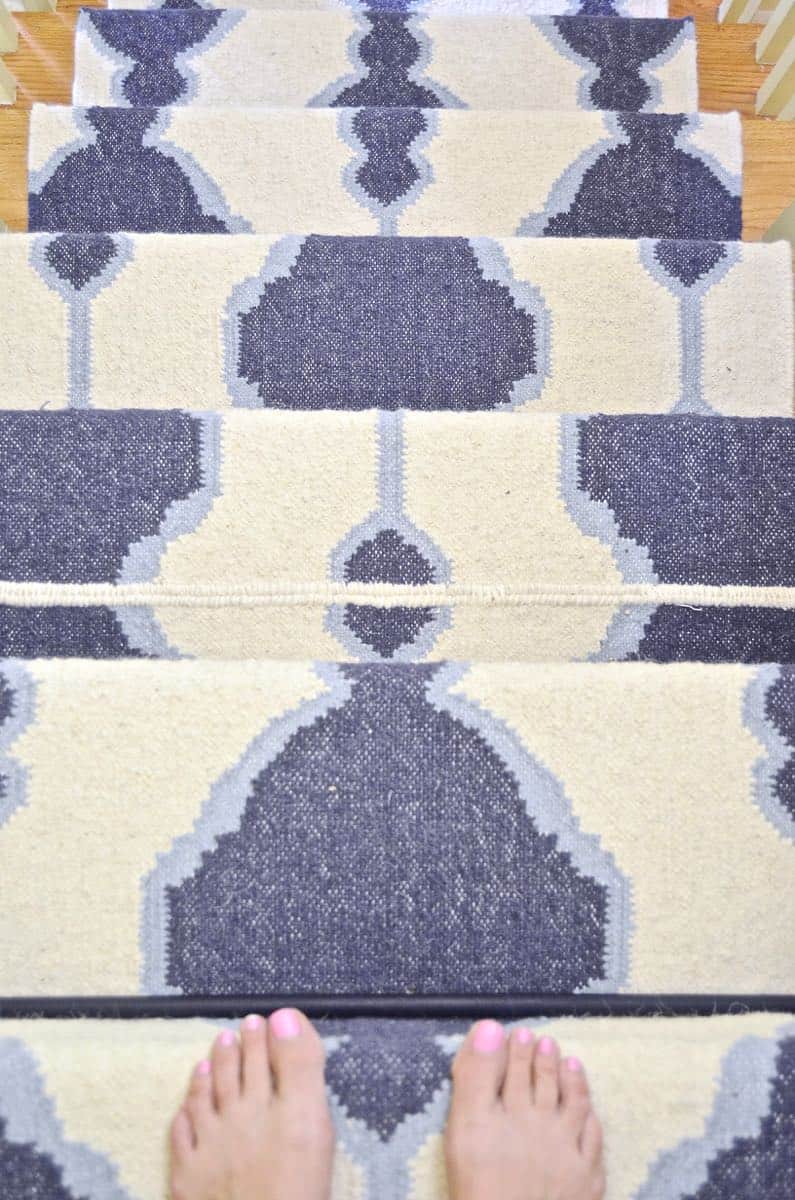
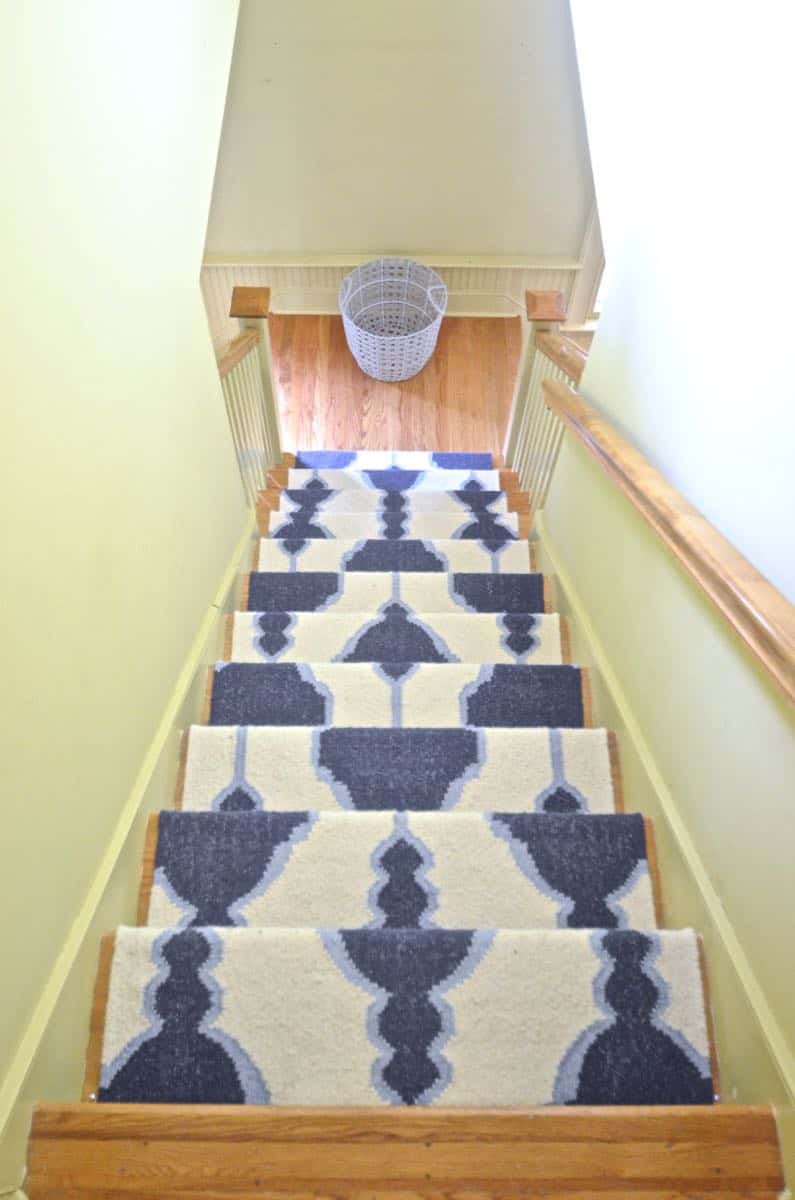
I did the math a few zillion times and determined how LONG I needed to make my runner… I had some wiggle room depending upon where I started it… either on the first tread or along the first riser (the vertical part of the stair, or the flat part of the stair). Two of these happened to fit our stairs perfectly! To install your rug, I’m sorry but I think you might need a pneumatic stapler… or at least something more powerful than a hand-held. It will also make the installation part take about 15 minutes. Measure to make sure your runner is centered. (Mine is kinda sorta… I measured, but apparently that’s not my forte. I was able to straighten it out after a few stairs though.) Hide your staples under the nose of the stair and staple the top edge in place.

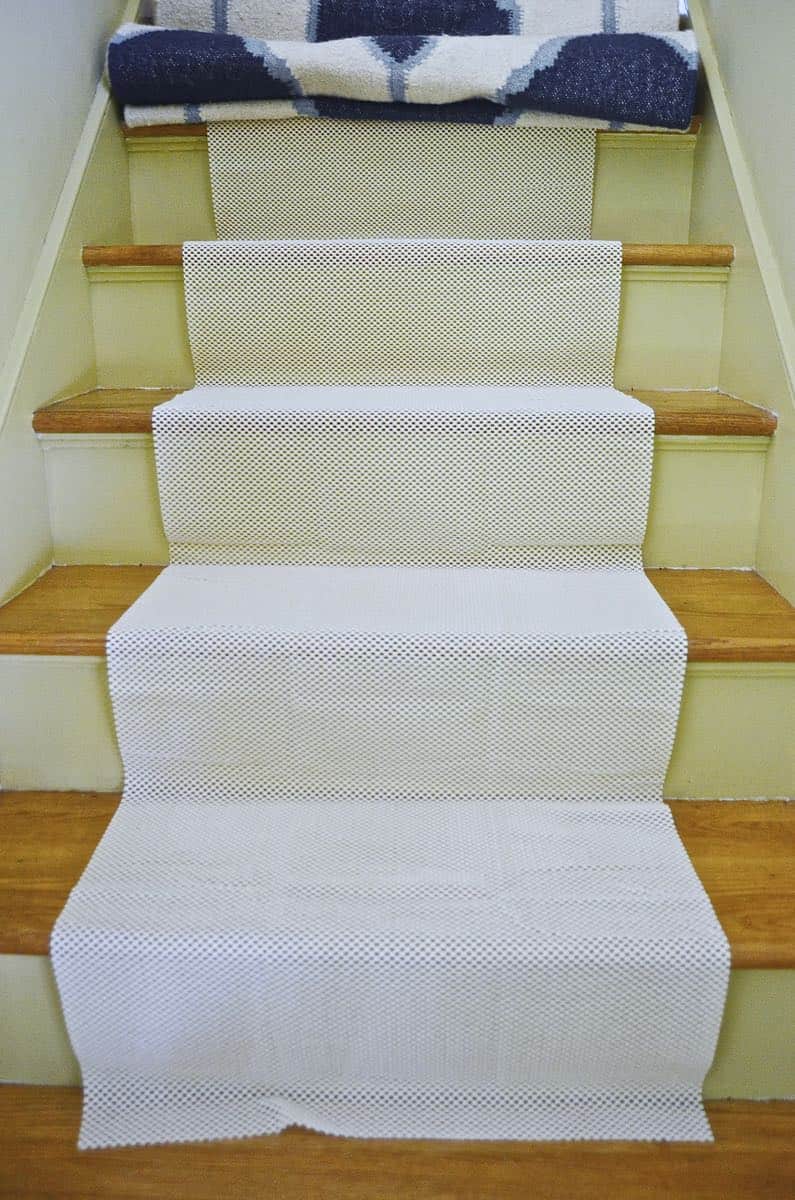
I also used an inexpensive runner just to help grip and pad the rug a bit… I gave this a couple of staples on each stair to keep it from bunching up on me.
Carefully wrap your runner along each stair and give it a row of staples to hold in place. I stapled only the corner where the tread meets the riser the first pass. THEN, I went back and stapled under each nosing. Not sure why, but it seemed to work for me!
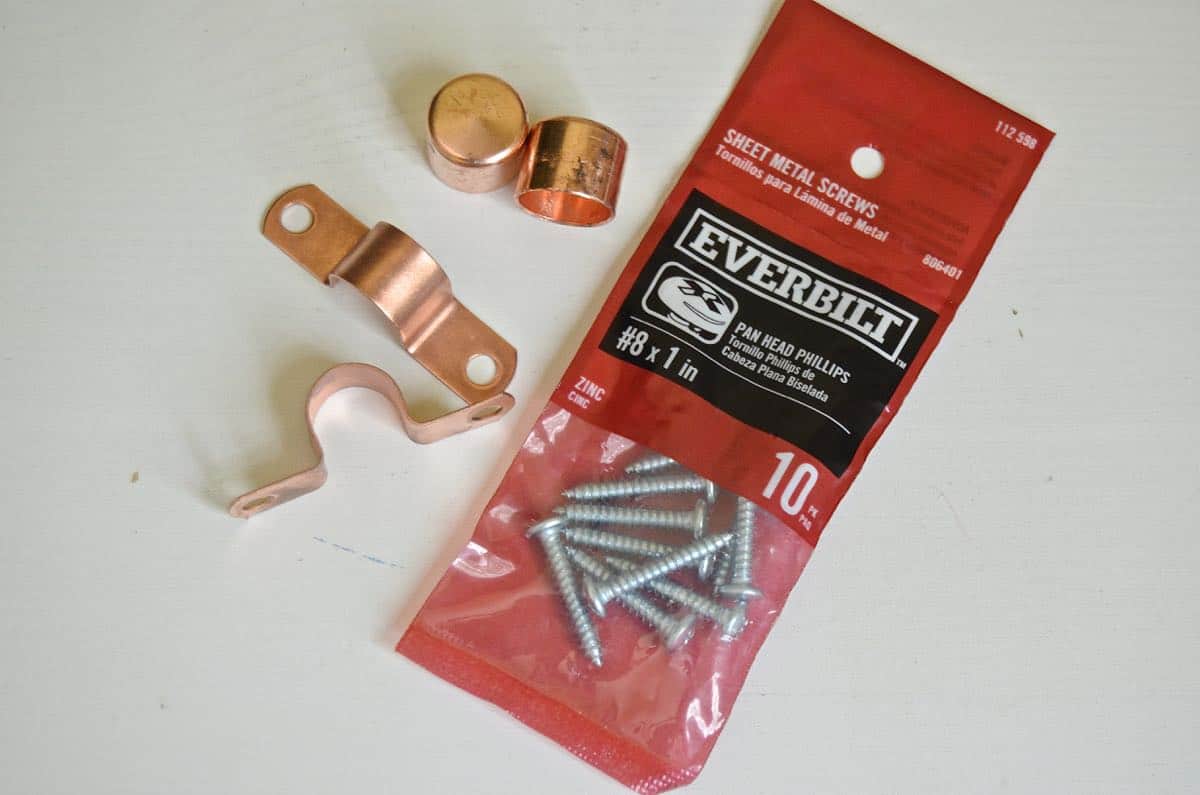
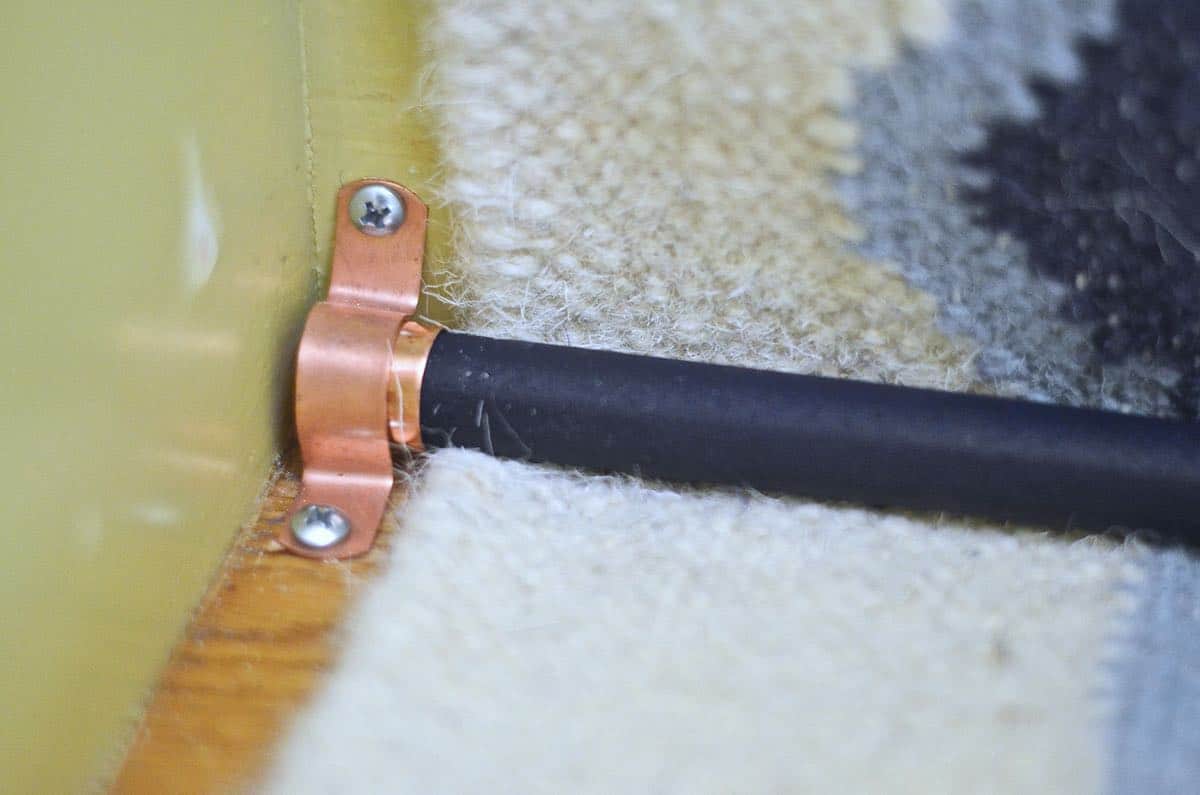
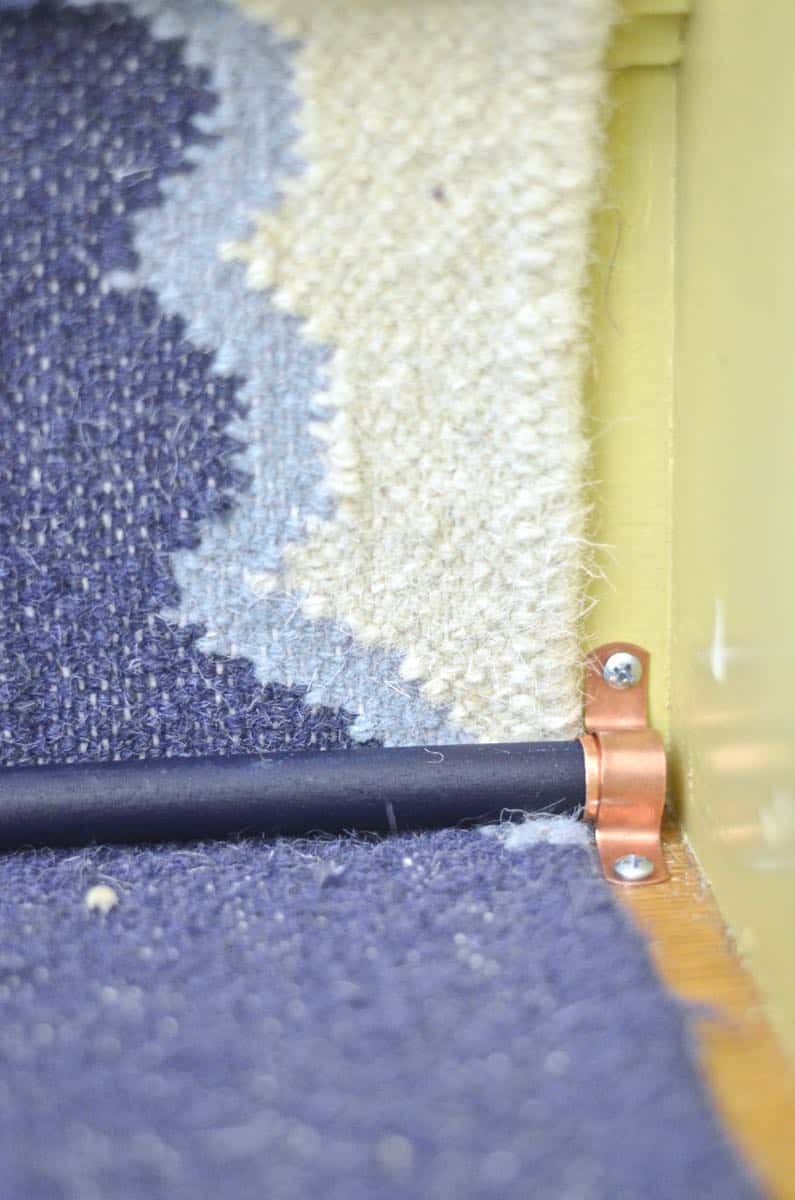
Now for the fun part… the stair rods. I liked the idea of using these to add a little visual interest but also to help secure the carpet a bit more. But… in general they run about $15 a rod. That adds up and fast. Not an option. Lots of times, I head over to Home Depot with a problem and I poke around to see if the solution pops up while I’m perusing random aisles of plumbing or electric or landscaping supplies. Roundabout way of saying, that’s how I came up with these inexpensive stair rods that cost under $40 for the entire staircase. You’ll need wooden dowels, spray paint, screws, these copper pipe clips, and end caps if you’re fancy like that (last two items will be with plumbing).
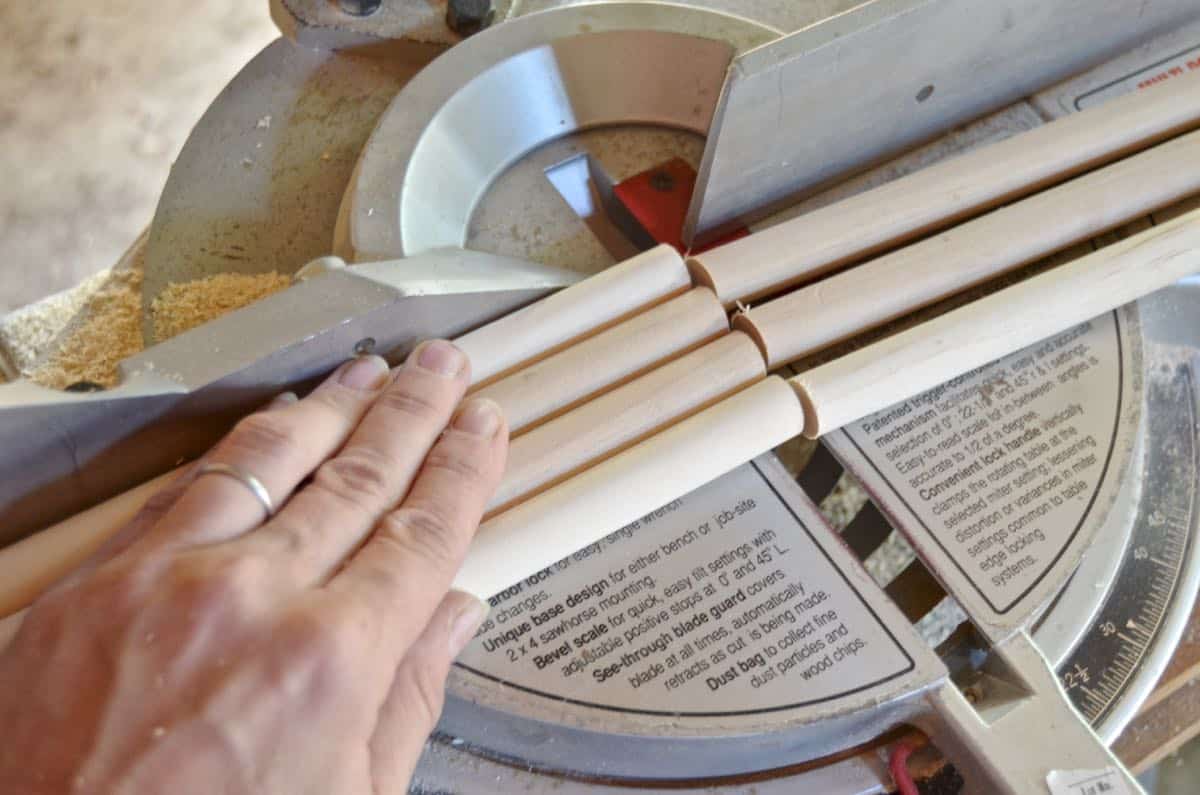
Cut and paint your dowels. (When I’m cutting lots of wood to the same size, I measure and cut one, and then use my hands to align the others… feeling whether the wood is lined up and identical is much easier for me than relying on an exact measure to be identical over and over.)
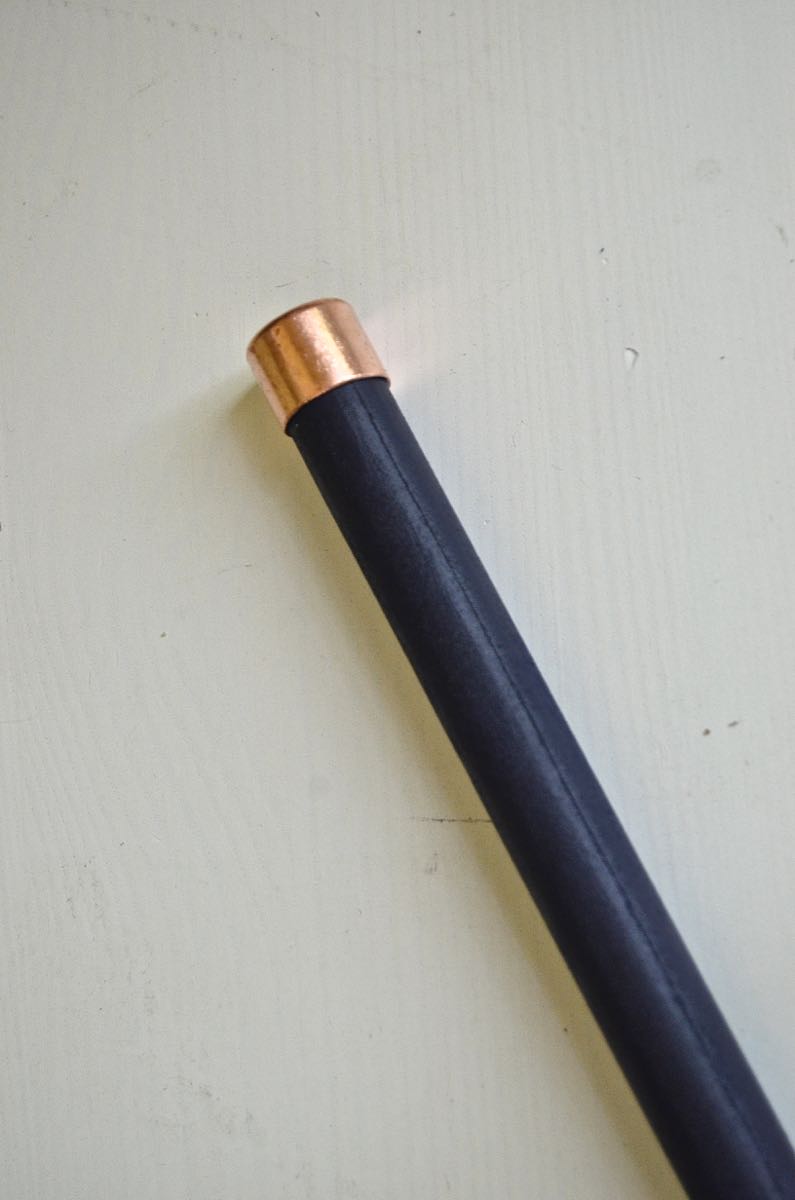
You’ll need to pull apart these pipe clamps so that they are now at a 90 degree angle. The copper’s pretty soft so I didn’t need any special tools, but pliers would probably help. Predrill your holes for this, but you’re basically using the copper clamps to hold each dowel in place- one screw will go on the riser and the other will pinch the rod down and go into the tread. The end caps were just to make the dowels look prettier… for $.30 a piece, seemed worth it!
For wider stairs, I’d say a dowel might not be quite sturdy enough, but these are a standard width and the wood holds the carpet in place just fine.
And just because I’m long on the persnickety scale, I picked up some paint sample pots to match each color in the rug, and painted where the two rugs meet… you can still feel a little bulge where the seam is, but you don’t notice it nearly as much now!
Here’s how it looks BEFORE I painted…
And now with the matching colors AFTER…
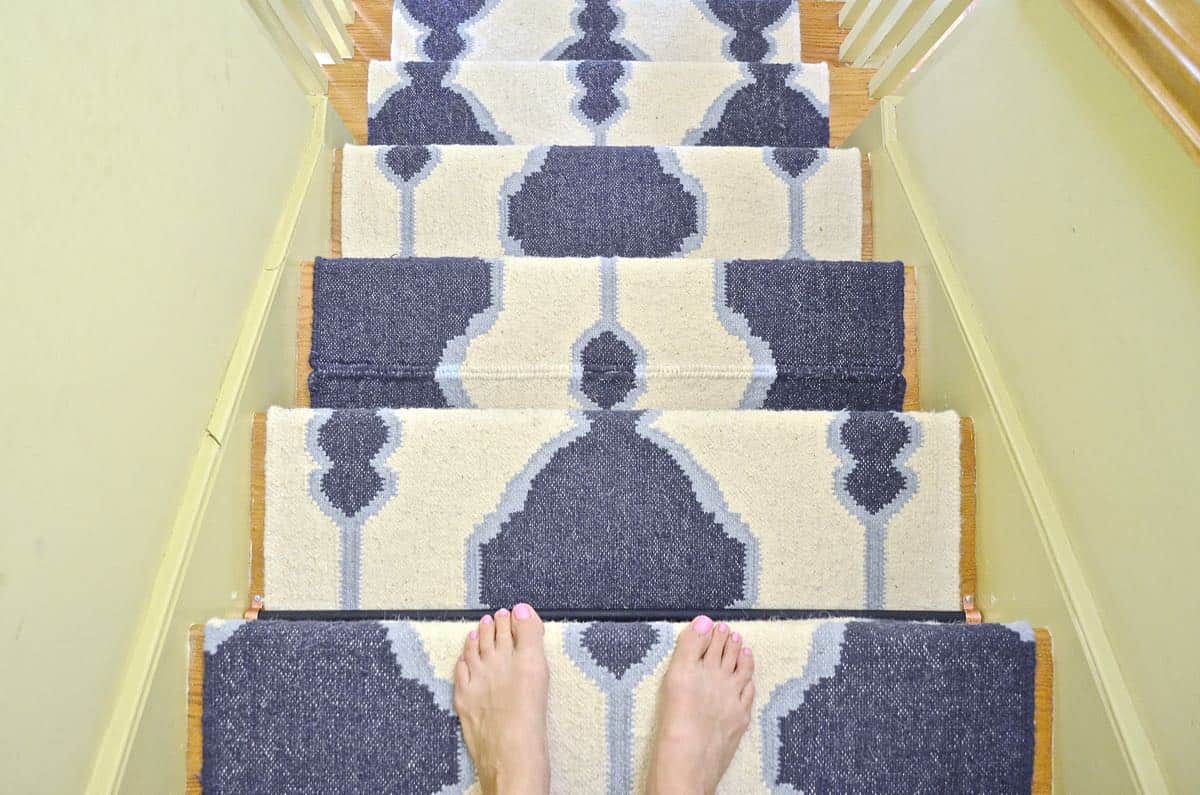
I love the colors of this runner and it obviously makes this high traffic back staircase much quieter… ya know, if you happen to have a 4 year-old Brontosaurus running around the house like we do! The stair rods are such a fun little touch. I love the aesthetic but also the function they provide! Big shout out to RugsUSA for again hitting it out of the park with one of their rugs… I have spent far too long trawling their website than I care to admit!


I truly cannot believe how well the sample pots matched the rug color. I knew I’d love it when I saw the sneak peek, but I looooooooove it even more now. Awesome job! Can’t wait to walk it in my bare feet. 🙂
Ha! Yeah… it’s niiiiiice with bare feet. The sample light blue’s a little lighter than it should be but the navy is spot on. Makes a BIG difference, right?! Thanks, love!
Charlotte, this looks fabulous!!!
Thanks, Christie! Isn’t it the prettiest rug?! (Missed you guys this weekend in Atlanta! Hope your ears were burning… so many nice complements about your awesome fabric in Eleanor’s room!! xx
What a great idea! Love the look of it too 🙂
Seriously?? Brilliant! It looks great!
I didn’t know those were a thing and that they existed! Such a nice touch they add. And I love, love, love that you painted the rug so the weird gap in color disappeared. That rocks.
Ha! I couldn’t believe how well the paint worked!! I think of those runners as being a little stuffier than we are, but I like the little bit of added stability they provide. Ya know… in case 94 pairs of feet are racing up and down the stairs all day/ every day! 😉
I know this is an old post, but in curious if you think cheap tension curtain rods would work? I have a tile staircase sith two toddlers and a big dog. We havnt moved in yet but im sEarching for solutions.
Hi there! That’s a great idea! I would worry that a heavier rug might pull against the tension rods and snap them out of place if the rug isn’t attached otherwise. If you’re planning to staple the carpet in place then they would totally work.
what size dowels?
Totally up to you and your aesthetics! I believe these might have been 5/8? I grabbed copper caps I liked and worked backwards to the dowels that fit the caps.