
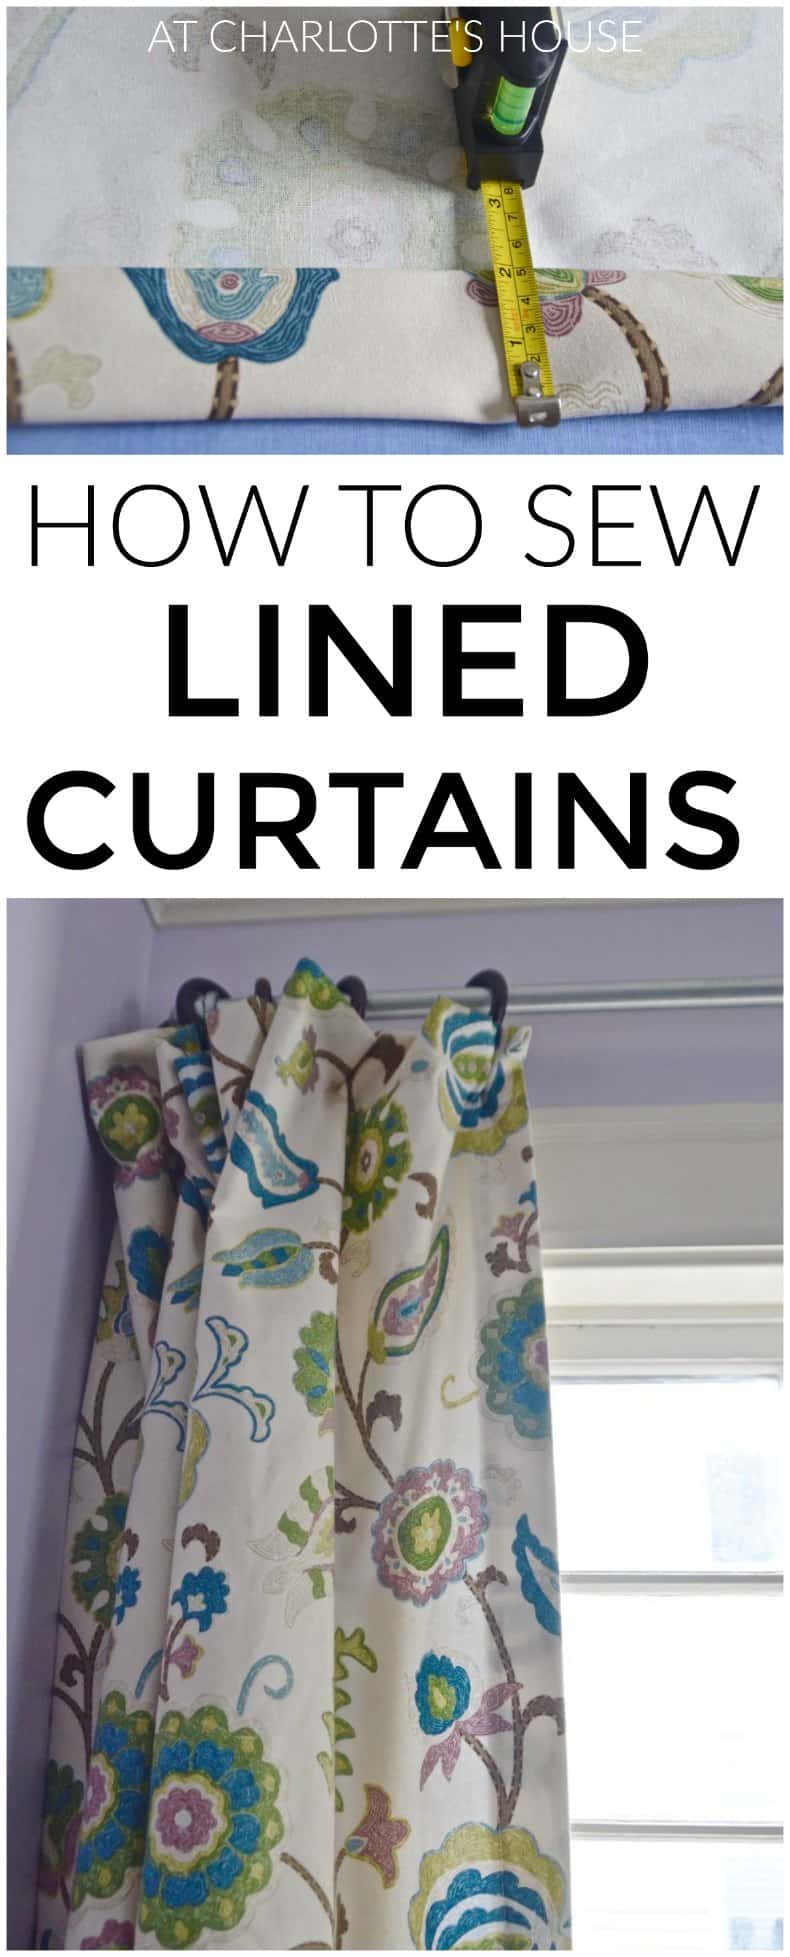
How to Sew Lined Curtain Panels
Psssst… this post *might* contain affiliate links: see my disclosure here.
Easy Tutorial for Sewing Custom Lined Curtain Panels
I have a couple of different brands to thank for our amazing new dining room and Online Fabric Store is one of them. May I present the greatest lined curtains of all time. And if they’re NOT the greatest curtains of all time, they’re pretty dang close!
Full disclosure, Online Fabric Store gave me a gift certificate towards some of this fabric but I totally fooled them because I woulda bought the fabric regardless. I discovered OFS last year when I was on a reupholstery kick and found out they carried like EVERYthing reupholstery… tacks and hammers and gimp and webbing. Yeah… I was into it all.
Shop my favorites!
Step by Step guide to sewing lined curtains
Back to my dining room curtains…
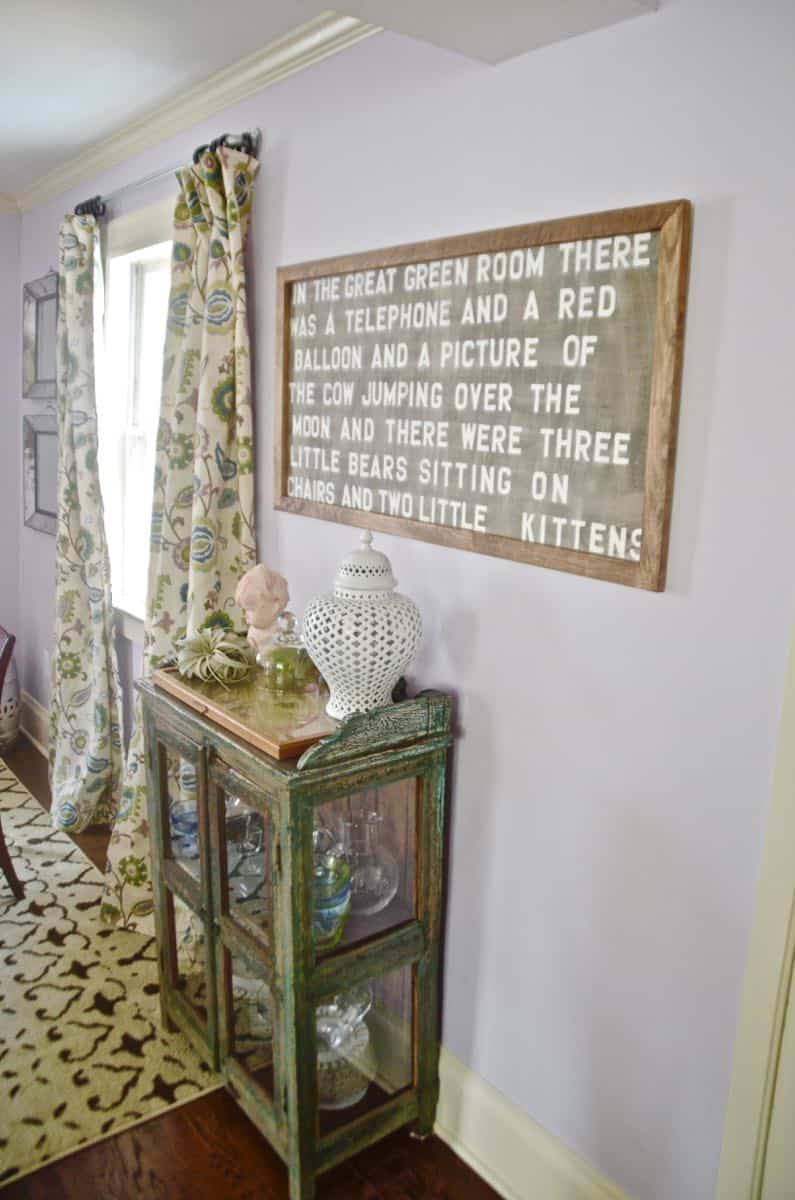
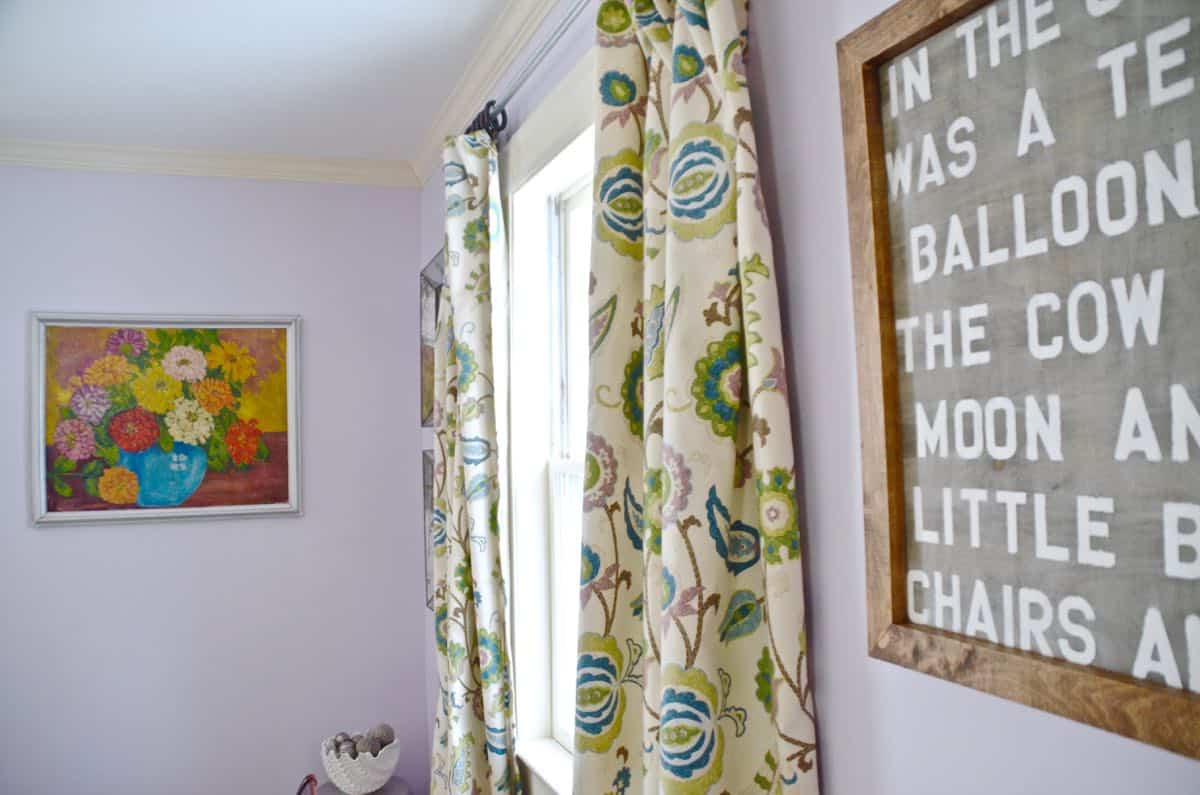
You’ve heard my whole schpeal about lavender… I really wanted the fabric in there to mesh with the lavender and help to keep it a more sophisticated shade and less ‘look at my new ballet leotard’ shade. Enter Braemore’s Selim pattern (affiliate).
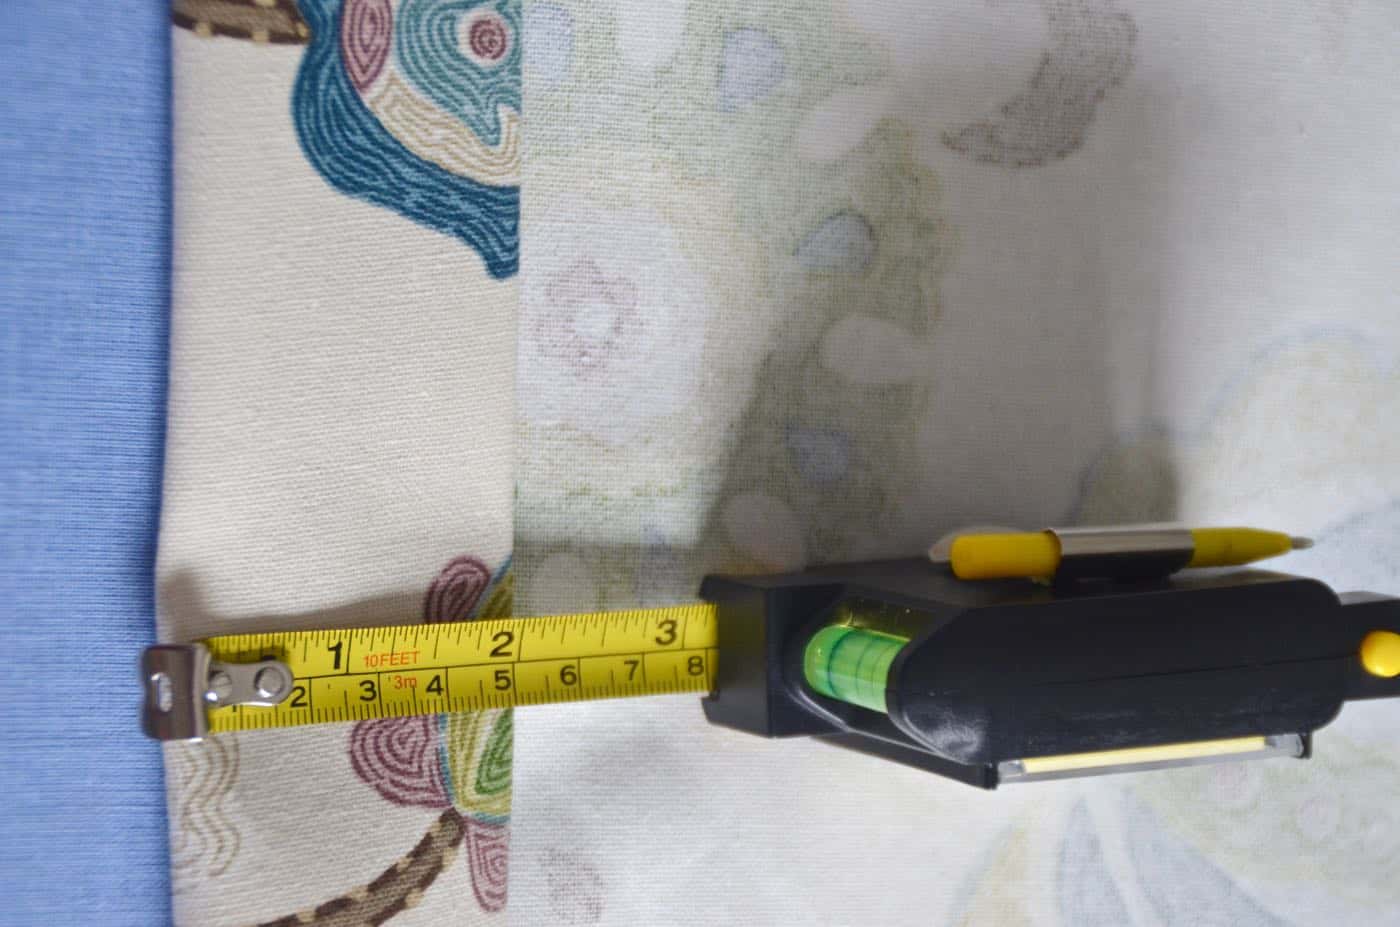
Step 1. Measure and cut the fabric
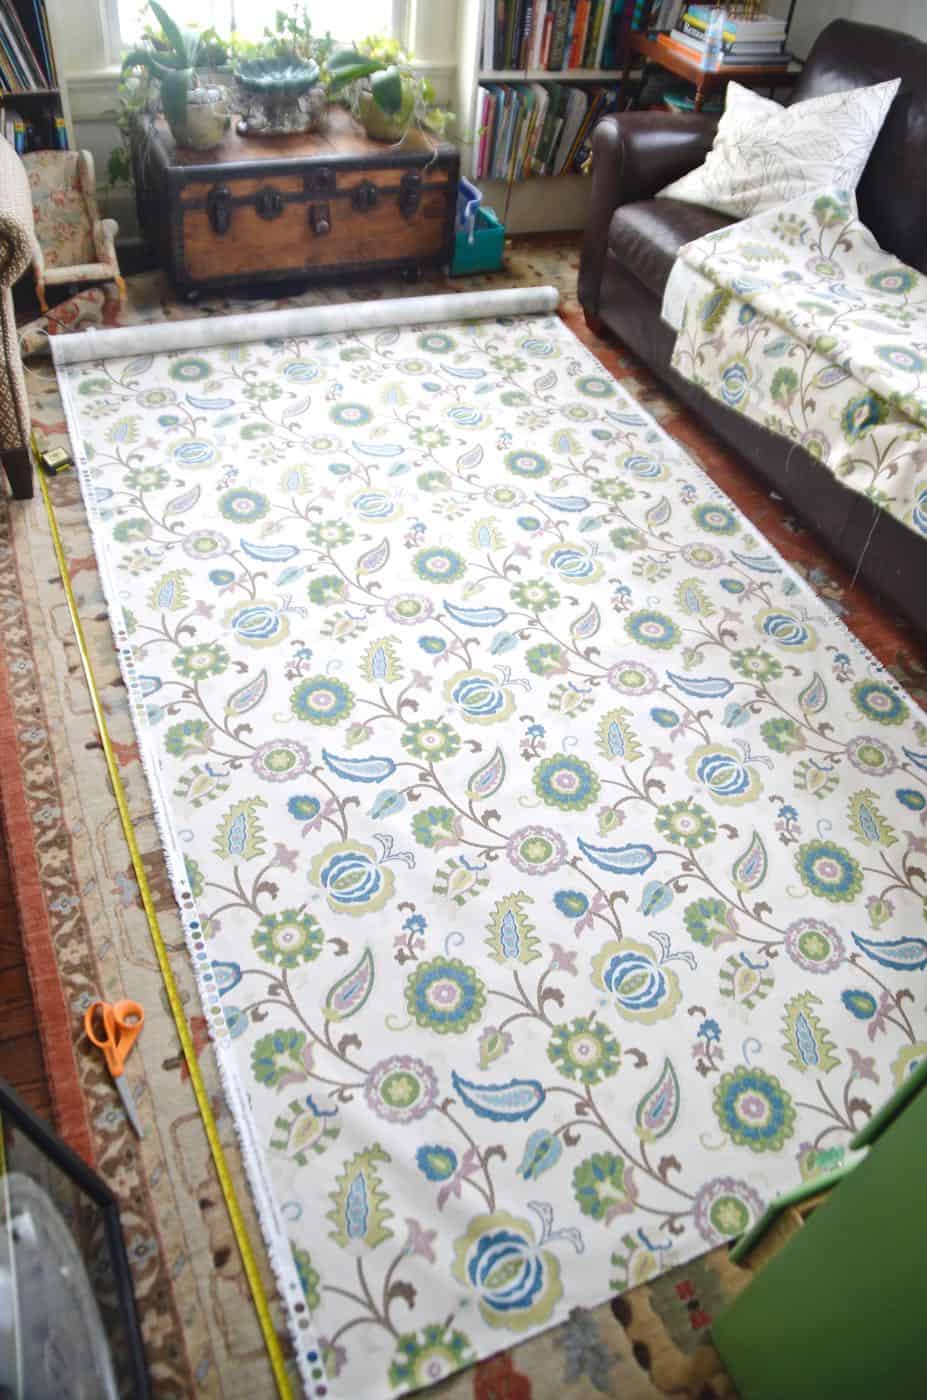
I typically add 7 inches to whatever I want my final curtain length to be. I allow for a 3-inch hem on the bottom and bottom edges and another 1/2 each to fold over the rough edge. As for the width, typical curtain panels are 45-inches, but I just use the width of whatever the fabric is.
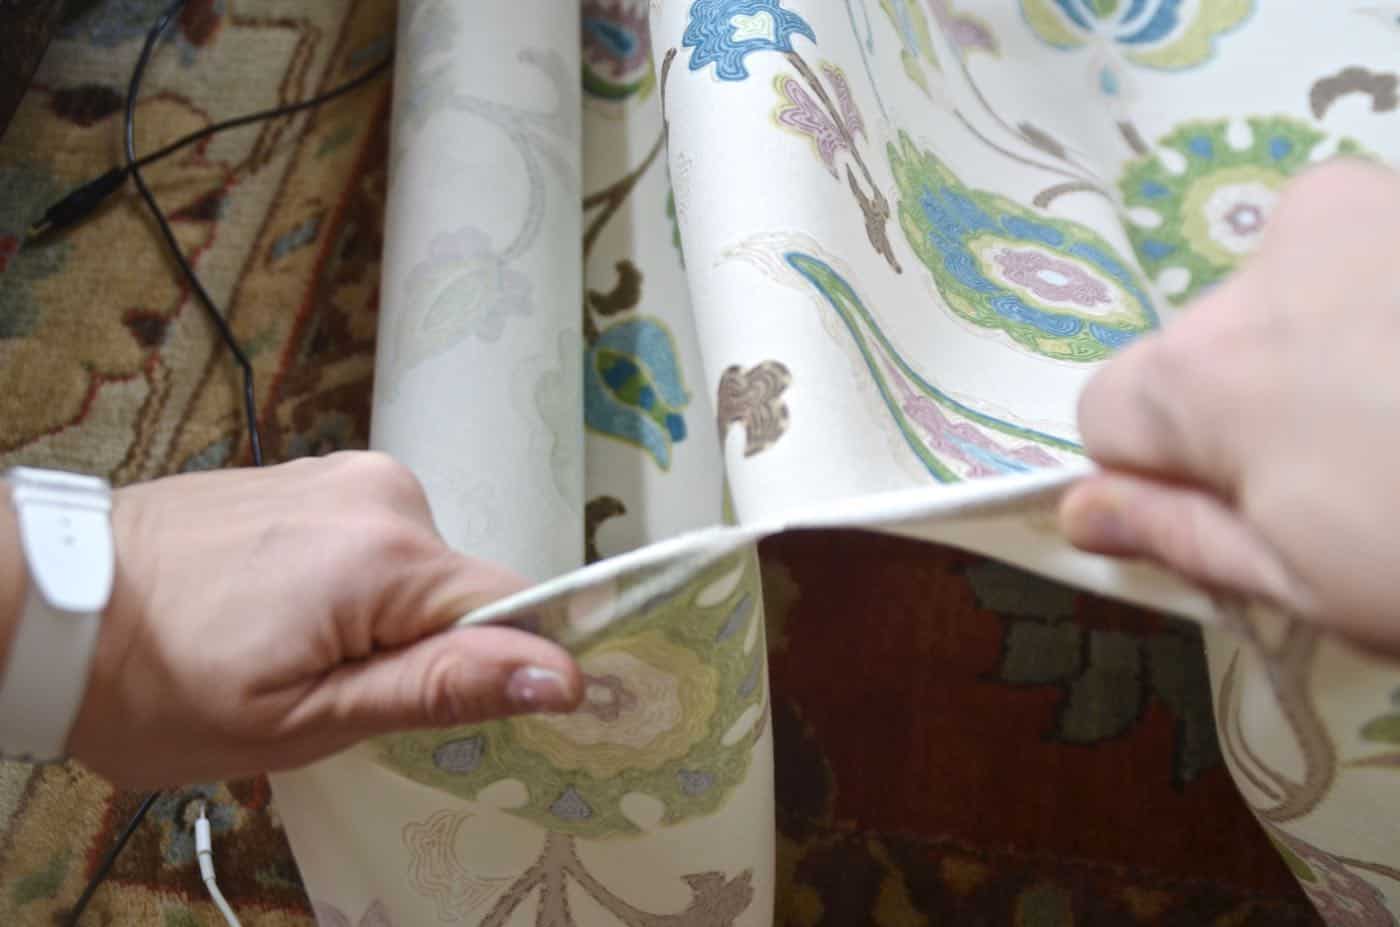
Step 2. Fold Over sides of fabric and Iron creases
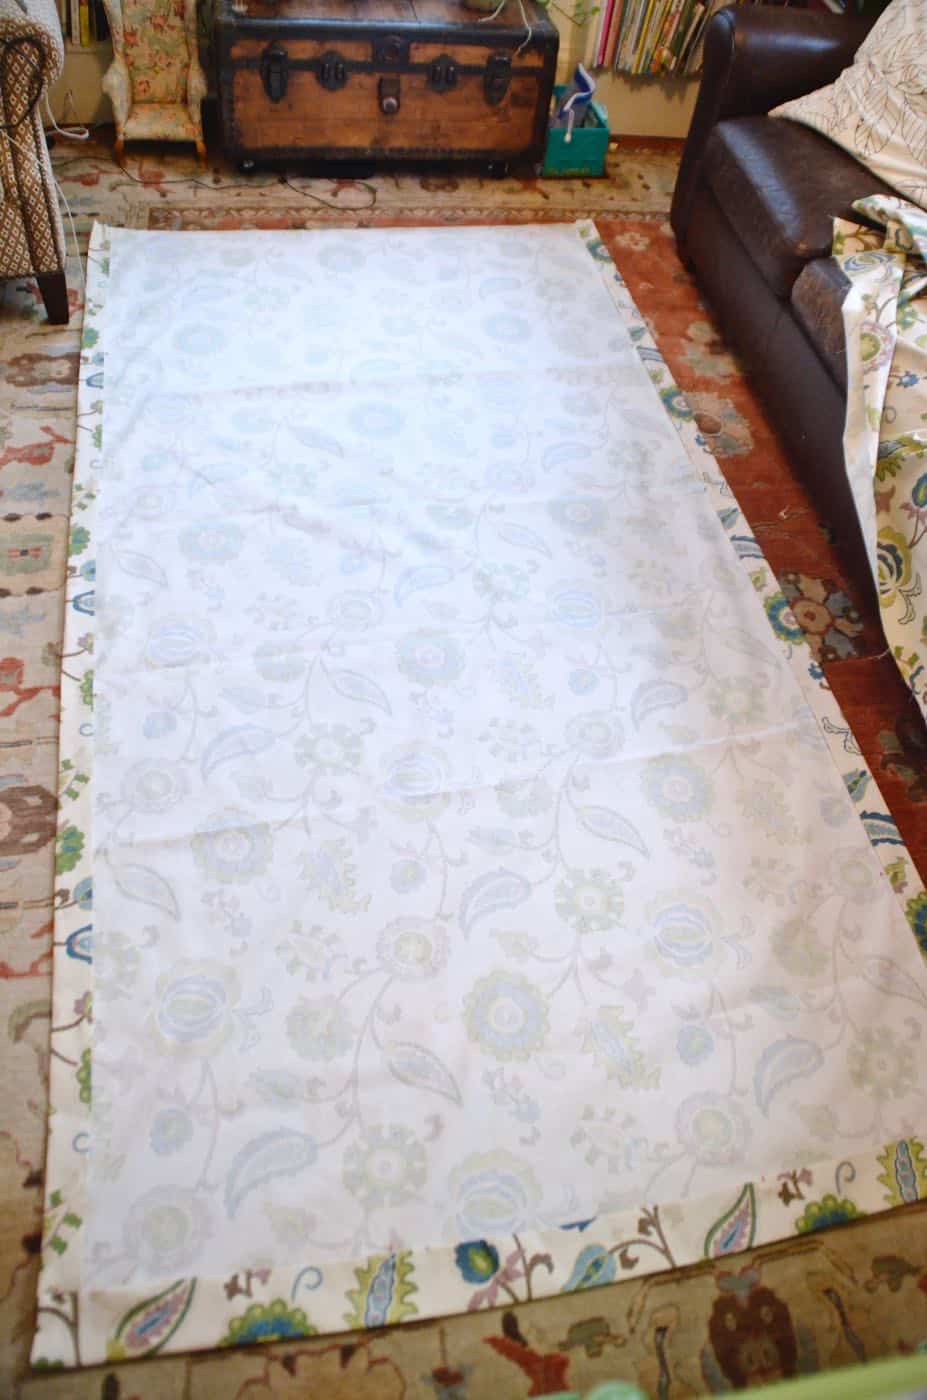
I try to measure so the panels stay straight, but I start by folding over 1/2″ of fabric and ironing. Next I fold over again another 1.5+ inches and ironing in place. This will be the side hem that will fold over the liner in step 4.
It’s personal preference how wide to make these side hems… I typically do 1.5 inches or more. These panels are 2 inches. For thicker fabric, you may need to have your iron set to steam or bring in some starch to get a better crease. That’s the extent of my knowledge about ironing…
Step 3. Cut off the side Hem of a Twin sheet
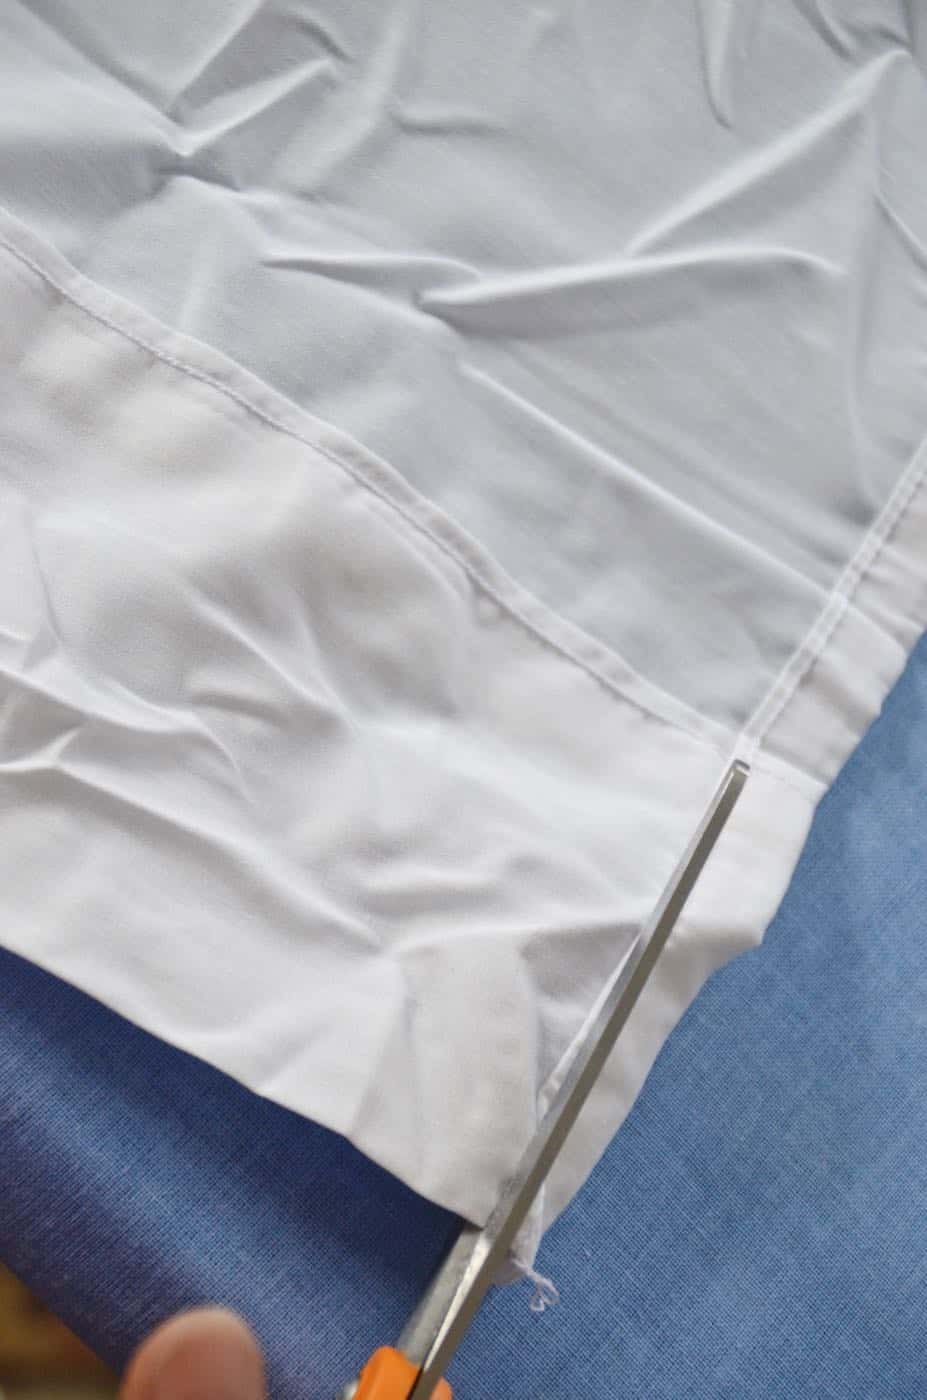
Cut the SIDE hems of the sheets so that you don’t have the added bulk. If working with cotton sheets, you can make one small cut and then rip the fabric along a straight line.
Step 4. Fold the fabric over the edge of the sheet
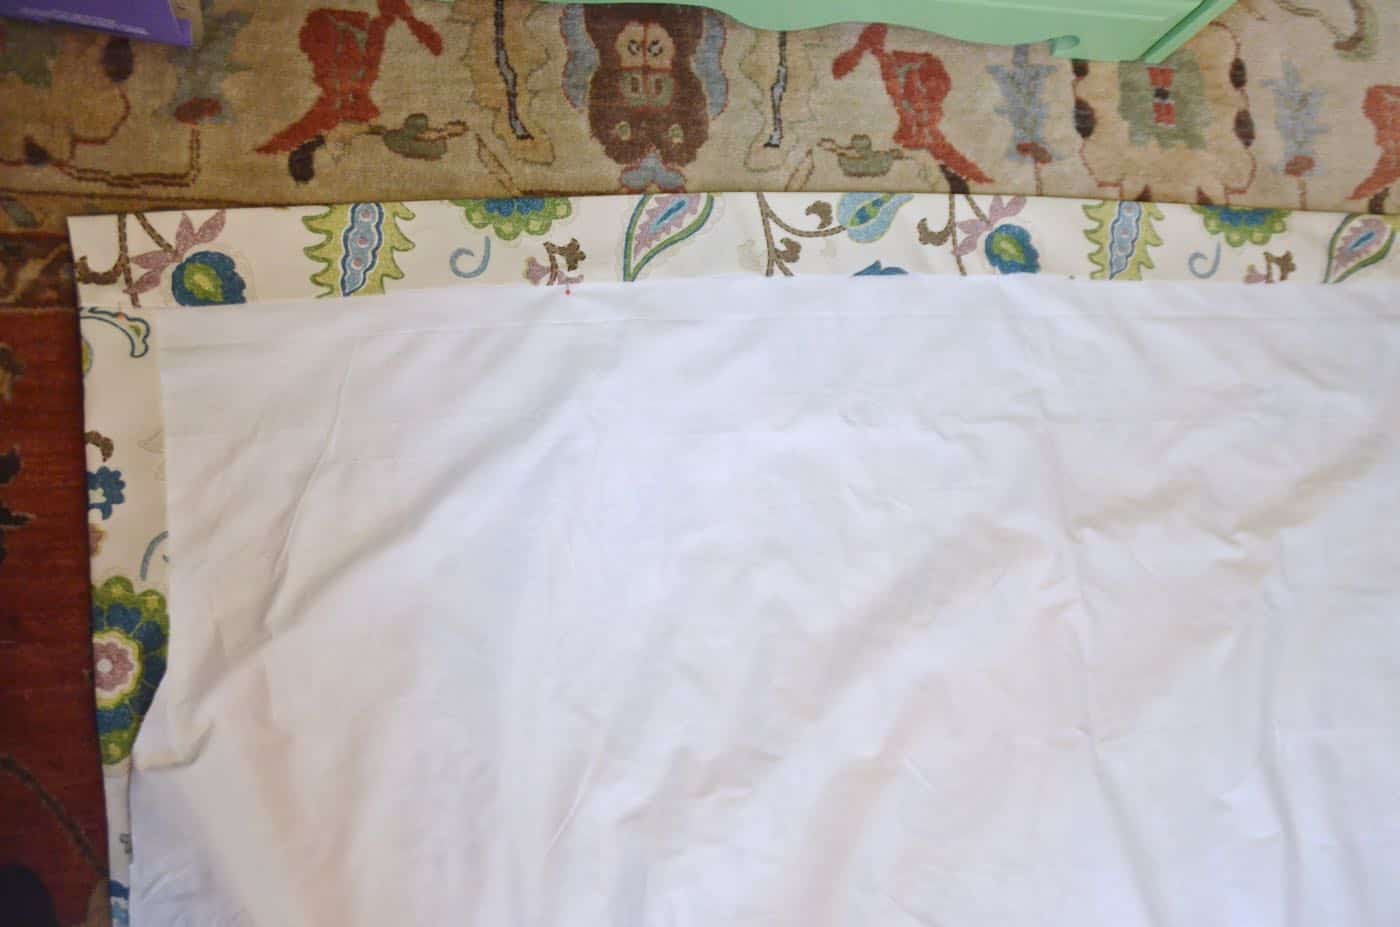
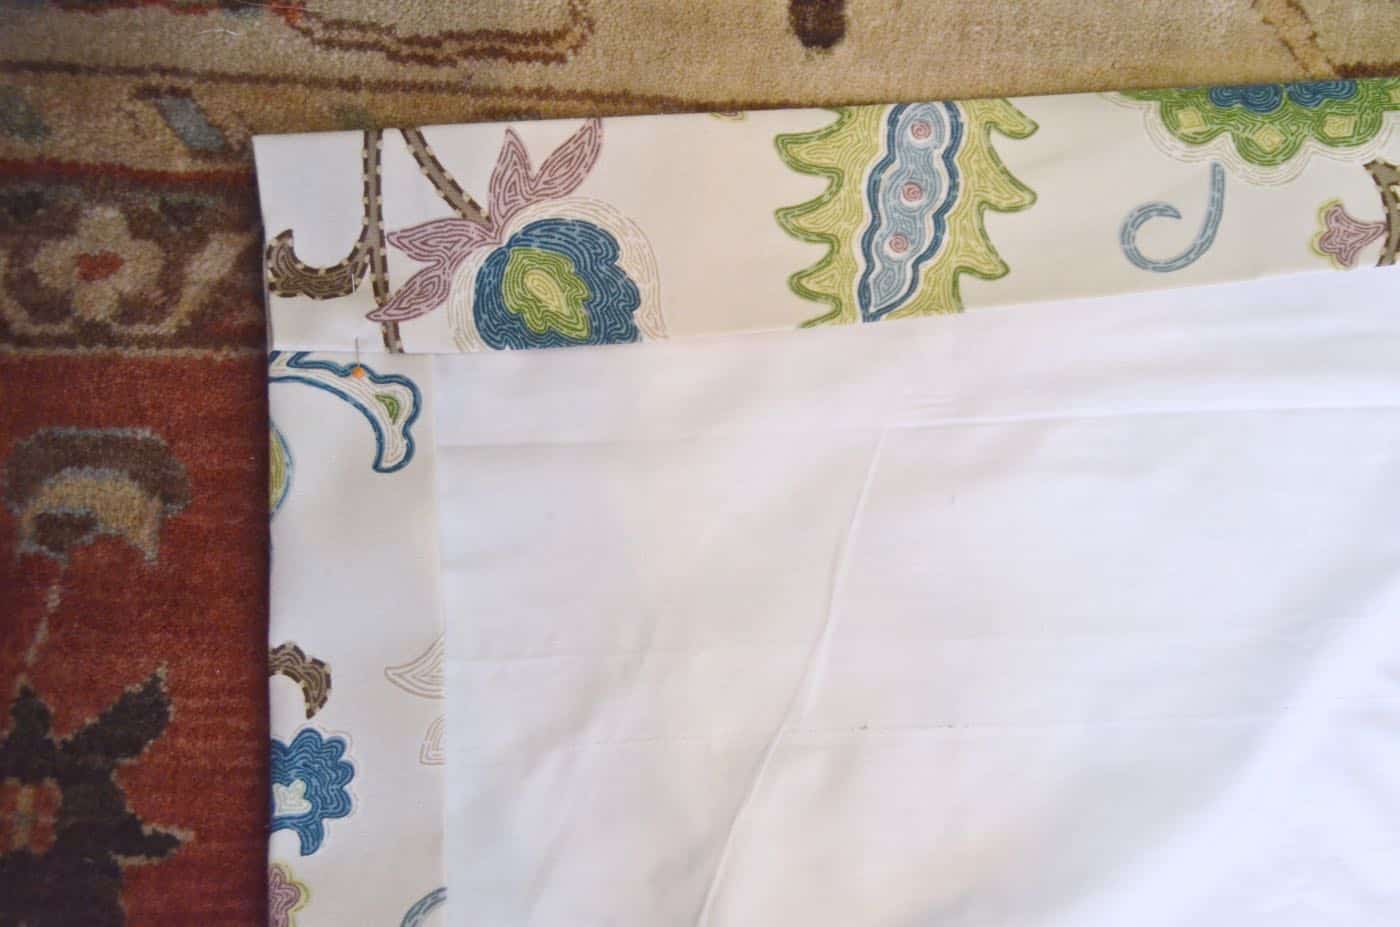
This is where ironed crease will be your life saver. Fold the ironed fabric over the sheet. When you sew this hem, you will sew the liner in place as well!
Step 5. Sew the bottom hem of curtain fabric alone
The bottom hem will be a little different. Ideally… you want the bottom edge of the liner to remain separate from the bottom edge of the fabric. The purpose for this is in case the liner reacts to laundering or humidity or whatever differently than the curtain fabric, you don’t want your curtain panels to start pulling and creasing. In order to create these two separate hems, go ahead and iron/ sew the BOTTOM hem of the curtain fabric first. I usually assemble the whole curtain first and pin in place and then quickly sew the bottom hem before going back around the sides and the top.
Step 6. Sew the side hems

Step 7. Sew top hem
You’re going to repeat this same process for the TOP hem: iron the curtain fabric into a crease and then sew in place around the sheet/ liner. I typically make my top and bottom hems 3″.
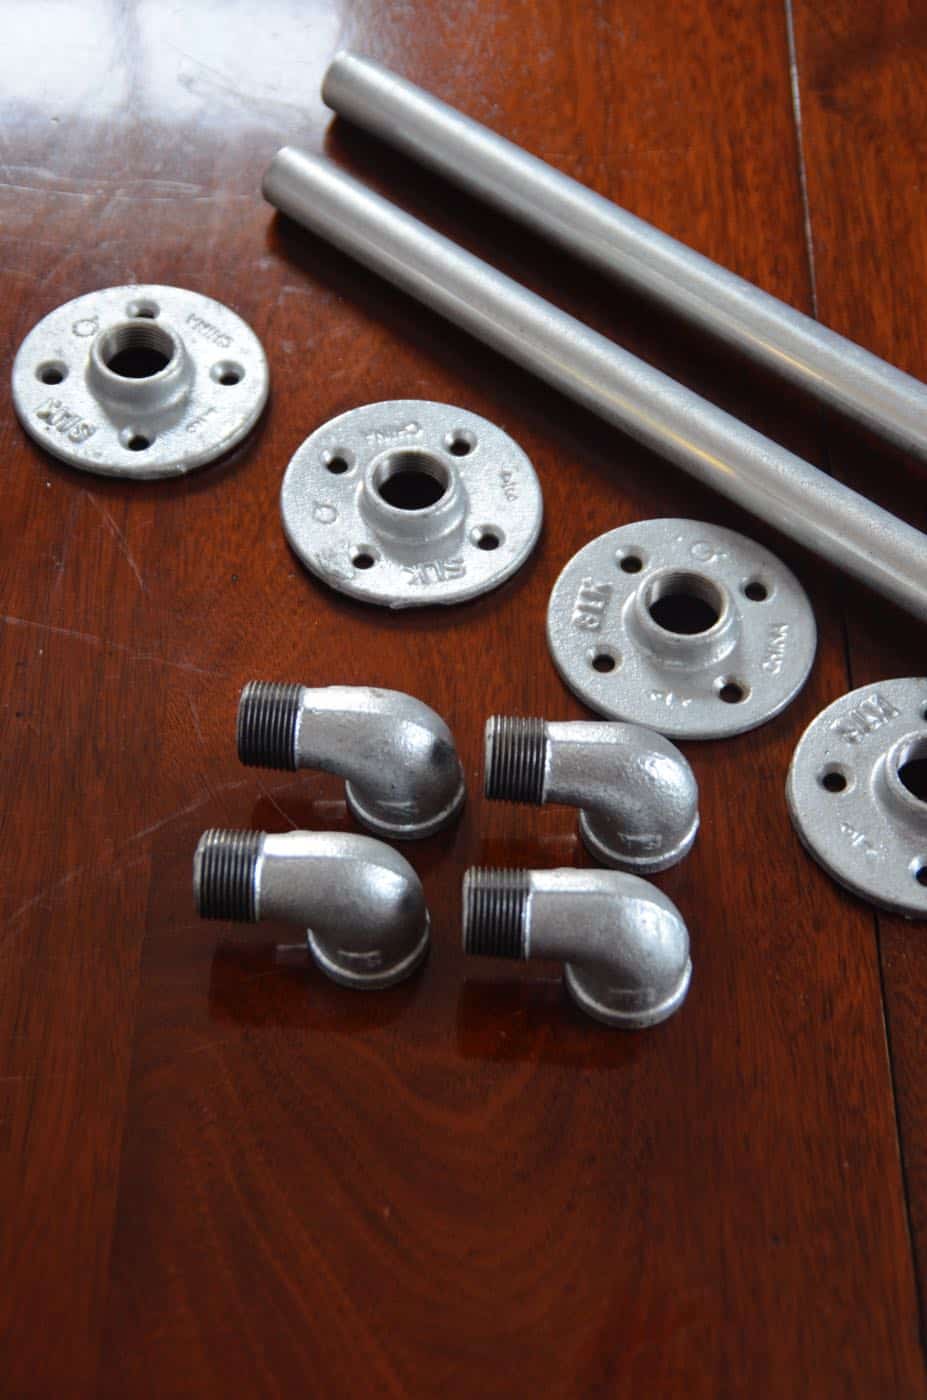
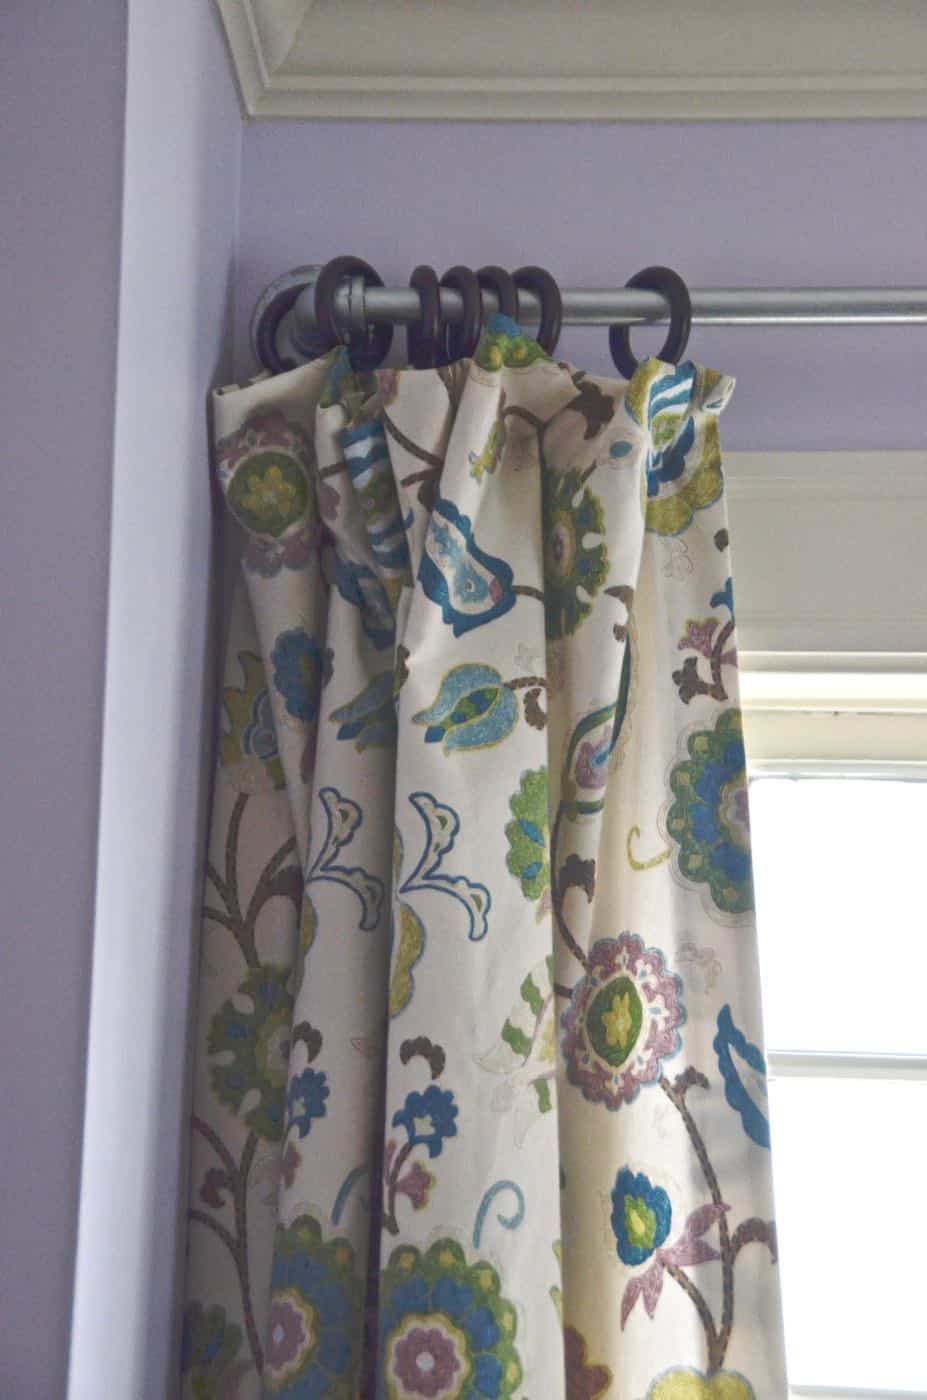
Floor flanges and pipes are popping up everywhere as interesting industrial materials for DIY. Everything from shelving to beds to curtain rods. I picked up four 3/4″ floor flanges (affiliate) Warning: floor flanges aren’t cheap… they’ll run you about $10 a piece so if you’re looking to get lots and lots of them, do a little work online for more affordable flanges. I also grabbed some electrical conduit… it looks like plumbing pipe but is cheaper and lighter… both good things for a curtain rod. It’s not threaded on either end, but it fits at least 1/2″ into the elbow joints I found so these curtain rods aren’t going anywhere.
 To install the curtain rods, assemble them first and then grab a friend to help… I don’t think it’s possible for this to be a one-person job unless you’re last name is MacGyver. We measured and determined which screws would be going into a stud and which ones would need dry wall anchors.
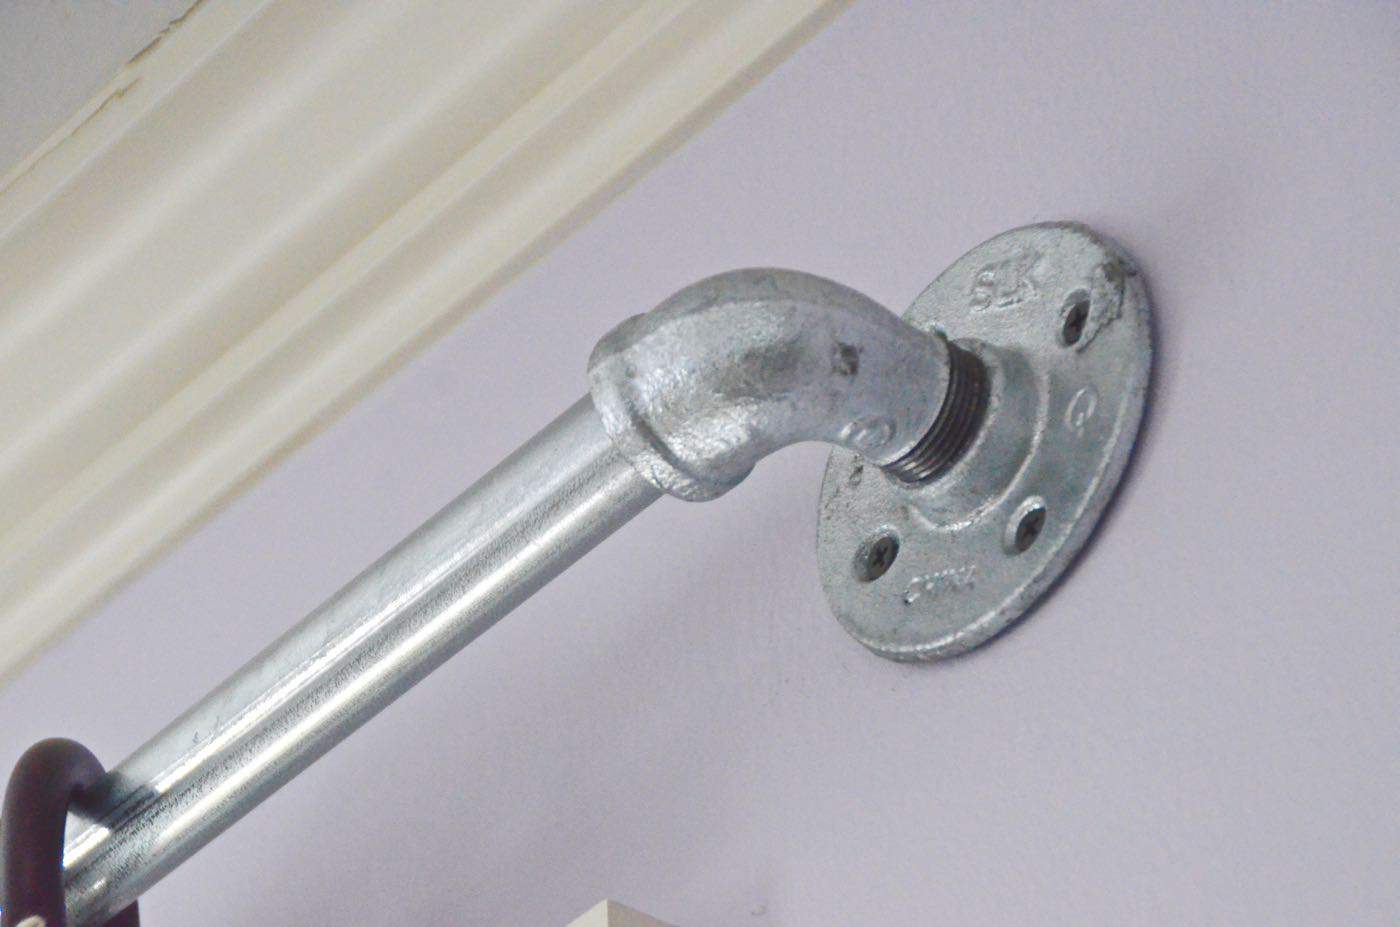
Mark held the curtain rods up with a level to keep them straight, and I ran around and drilled. We’re not doing pull ups on these guys, but they’re sturdy.
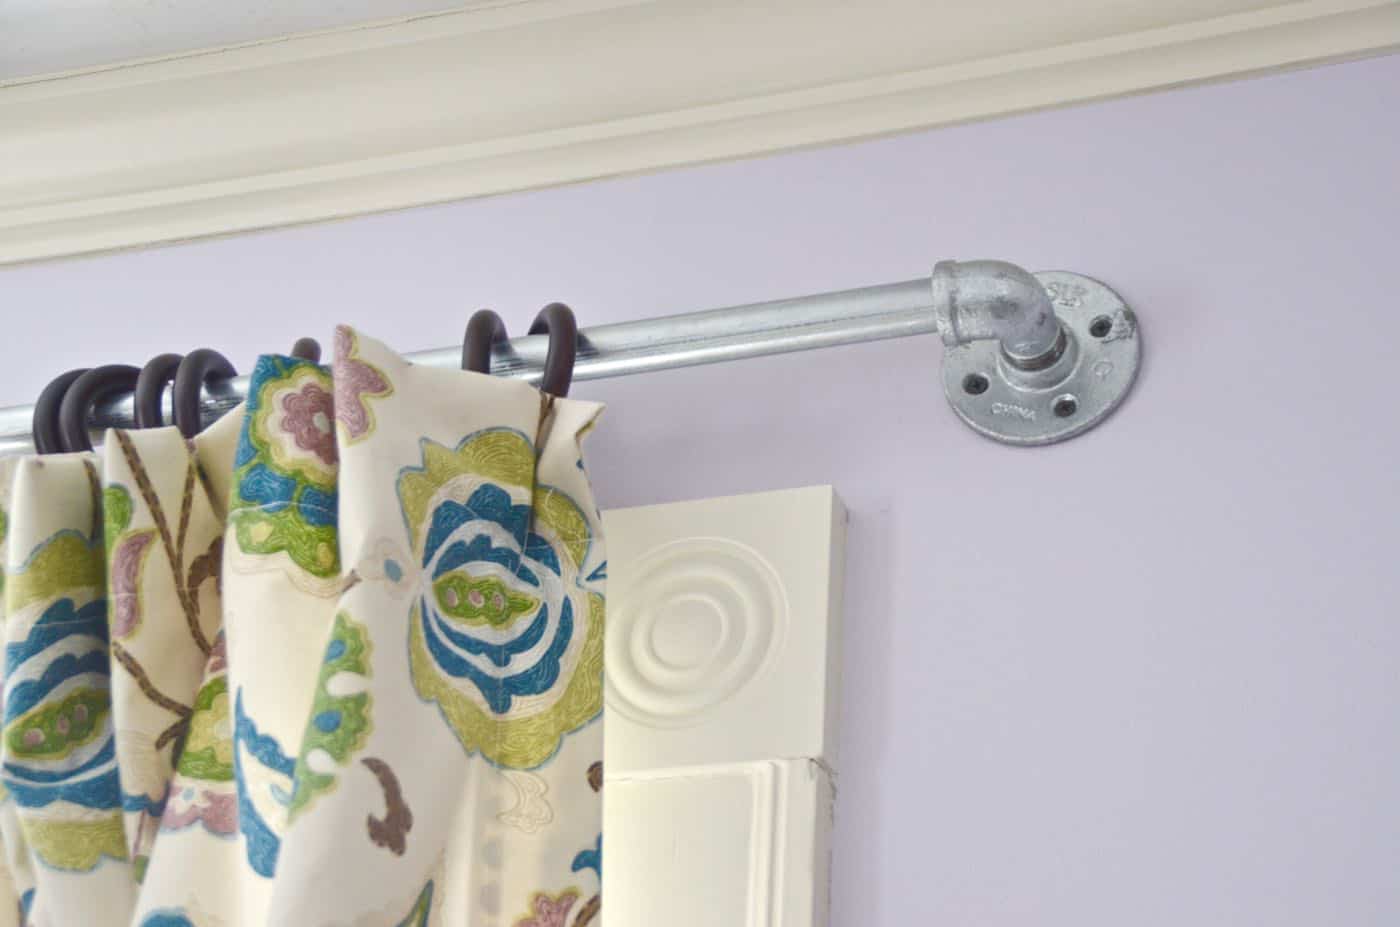
I used the simple wooden clip rings from Home Depot, but I clipped them onto my curtains about an inch below to edge to give the look of pinch pleats. Sewing isn’t my jam mostly because I feed fabric through the sewing machine with a hand as steady as Ozzie Osborn. But these curtains… to quote the ever wise, Rachel Zoe: “I die.” The lining makes them seem SO much more legit. (Also.. it’s true what they say about ironing stuff BEFORE you sew… so much easier.) I cannot even describe how much I love the fabric. It’s fun, colorful, and pulls everything together in this room.
Disclaimer: Online Fabric Store provided me with a gift certificate but the opinions I have shared are 100% my own, and Online Fabric Store did not tell me what to say or how to say it.


i really love the fabric you chose. it makes the room feel grown up, but still fun. Love the pipe rods too!
Gorgeous, Charlotte! (pinned!) Thank you so much for the shout out too! What a sweet surprise! xo
Thanks, Roeshel!! I could LIVE in your pantry… those shelves are amazing!!
Love the industrial and long lasting look of the pipes. I have had many curtain rods over the years break so eventually I ended up taking them down but nice quality ones are so expensive. Thanks!